Texture maps can be used not only to provide the basic patterns that make a material appear as a specific form of an object, like a brick path. It can also be used to control other attributes of the material such as where roughness is applied. This can allow us to create effects like faked puddles and wet patches on our surfaces.
To create puddles using textures, create a new texture in the texture paint workspace using a white background. Make sure your object has a UV map, and use the texture paint tool to paint puddles onto your texture with a black color. Multiple using MixRGB to combine with the textures gloss map to define the roughness of the texture.
There are a couple of different methods to creating puddles on your textures, such as the ability to use other texture types like the noise texture node to create procedural patterns for your puddles. Still, for total artistic control, the painted puddle method works best.
Setting Up the Image Texture
Before applying the puddles to our material, we first need to create the image texture, as the puddles will be mapped out onto the image texture itself.
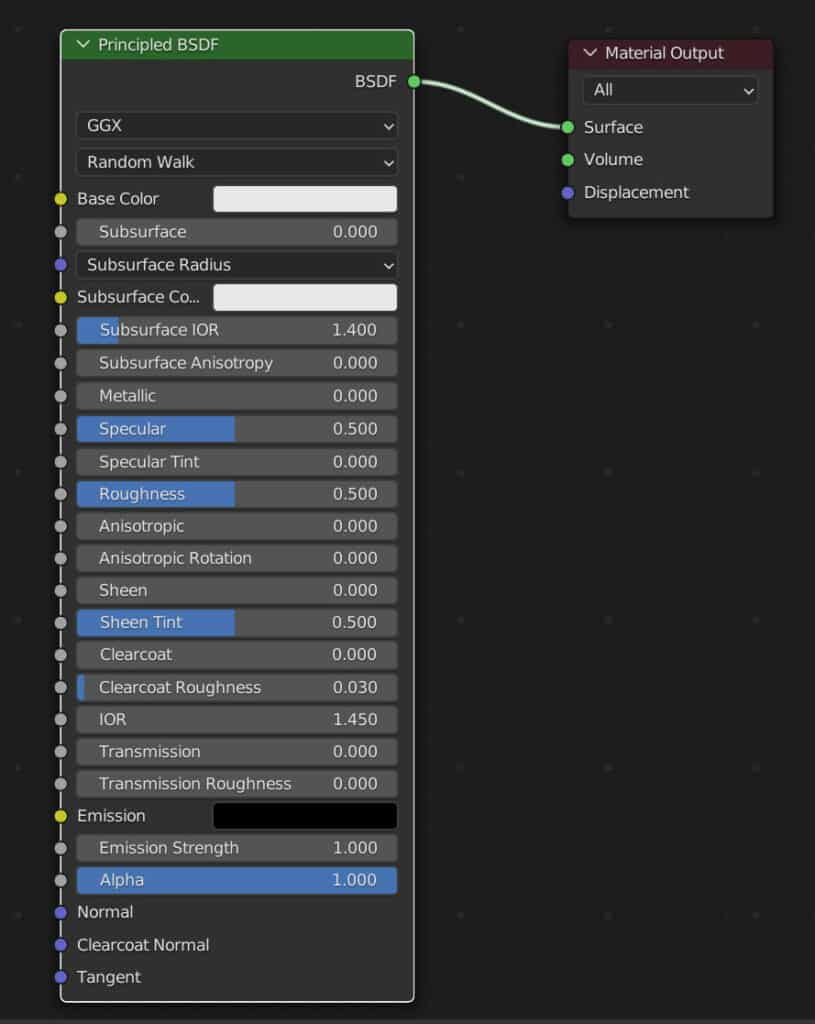
This process is the same every time. For a PBR material, use the Principled BSDF node as your primary shader and ensure that your object has been UV mapped.
For our example, and in most examples, we only need to use a flat or semi-flat object, like a road or path, so creating the UV map is a simple process.
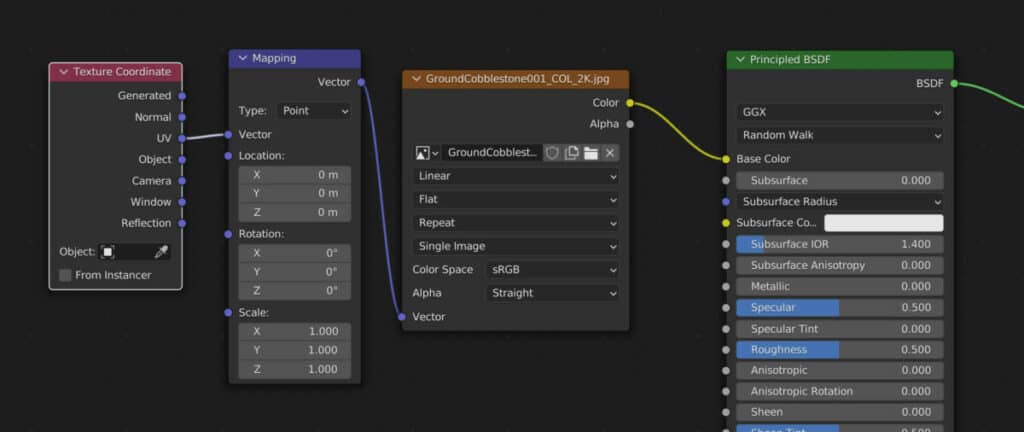
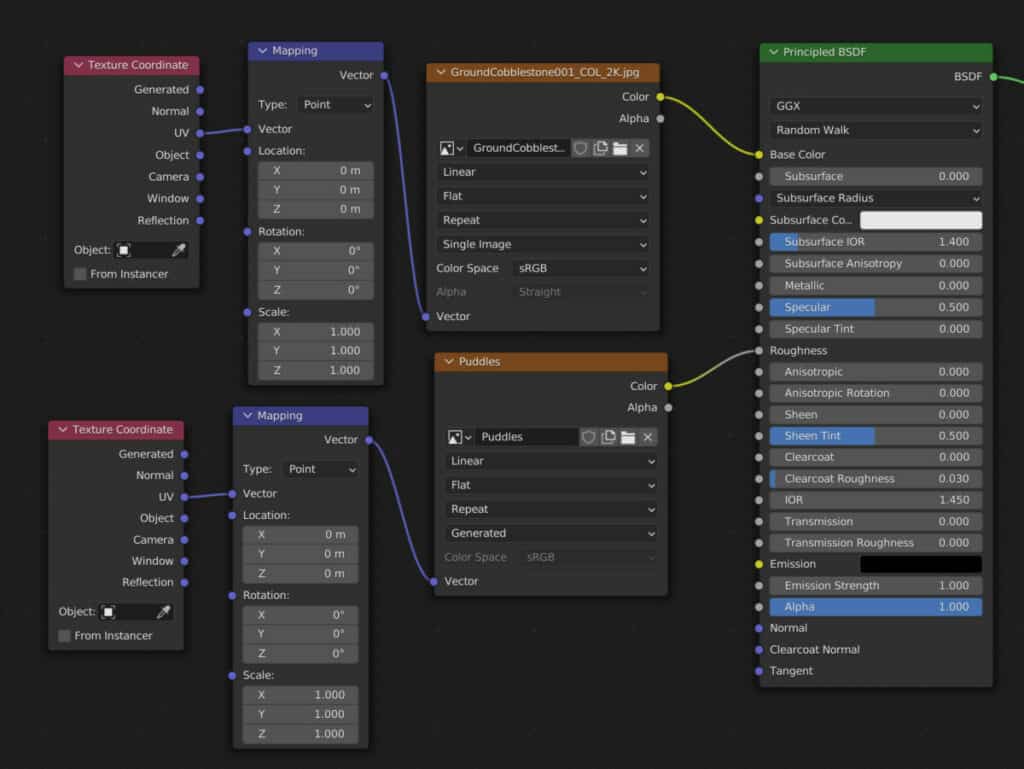
With your UV map applied to your model, add an image texture node and connect it to the base color of your principled shader.
If you are reading this article to edit your texture to display puddles, you will likely already have image texture packs that you plan to use.
There are several sites where you can access image textures, but we prefer to use Poliigon.com, which grants access to a wide range of image textures and various texture map types. Also, add a texture coordinate node and a mapping node as standard practice for controlling your map positioning.
Creating A Map For Your Puddles
The critical step here is creating a texture map that creates our puddles before applying it to our node setup.
Puddles can be displayed as highly reflective areas of the material, based on using black and white colors to control the roughness of specific areas.
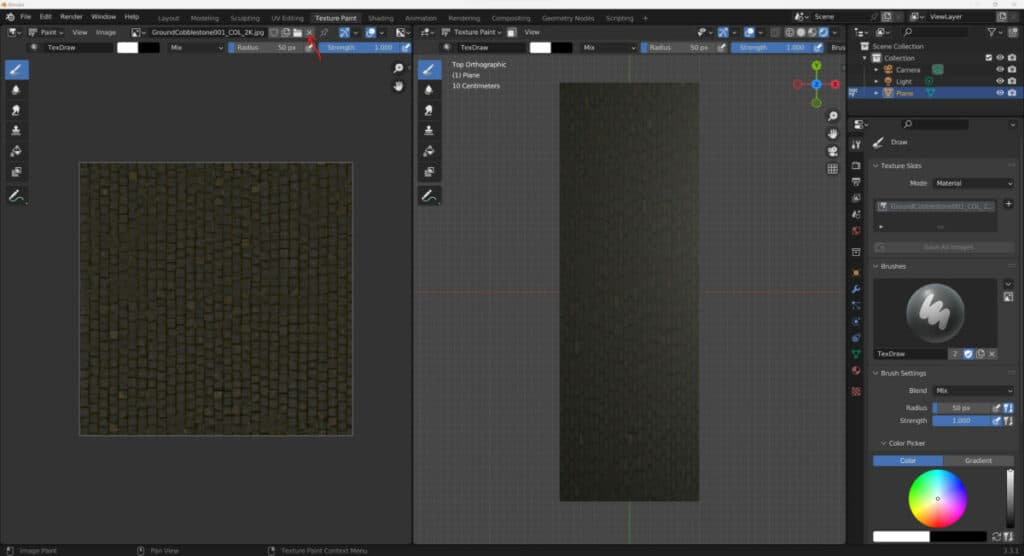
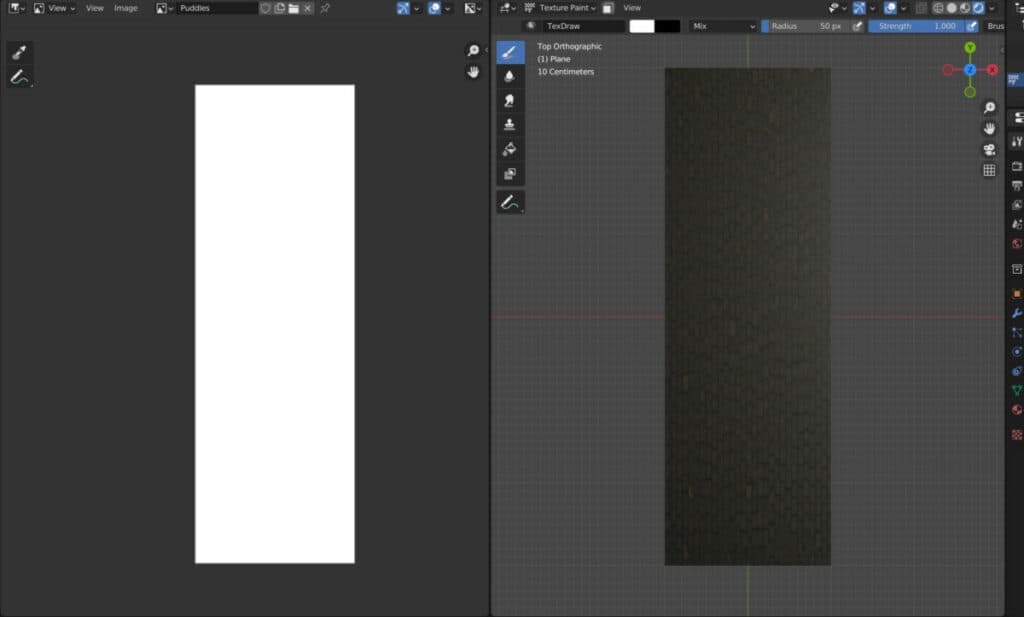
Go to the texture paint workspace, and in the image editor, unlink the data block of the current image texture by pressing on the X button.
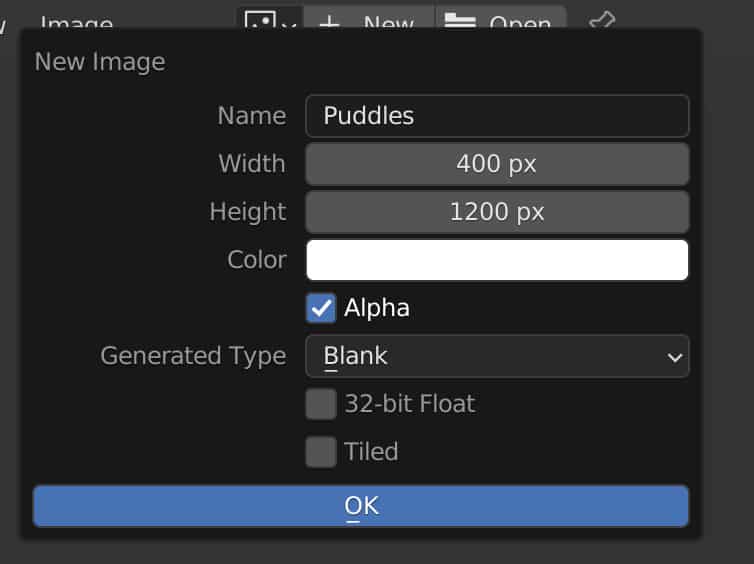
Select the new button that appears to display the options for your new custom texture. Name the texture puddle and set the target resolution.
While not a requirement, if you are working with a flat surface like a road, it can be helpful to set your resolution based on the X/Y scale of your road.
For example, if the road is 2m long on the X-axis and 6m long on the Y-axis, then the aspect ratio for the texture should be a 1:3 ratio, such as 600 x 1800.
Change the base color from black to pure white. When working with our roughness map, we will have white as the color that indicates maximum roughness, while the most profound black will represent the most reflective areas.
Click OK to create your new image texture map. It should look similar to your road or path if you go into your top orthographic view in the 3D viewport.
Again, this is not a requirement, but it can make the painting of your textures more feasible in the image texture panel.
Painting Your Puddles
Now that you have the canvas, you can look at creating the puddles by painting in a darker color on your white canvas. However, this will not be visible on your texture because the image has not been mapped within your note tree.
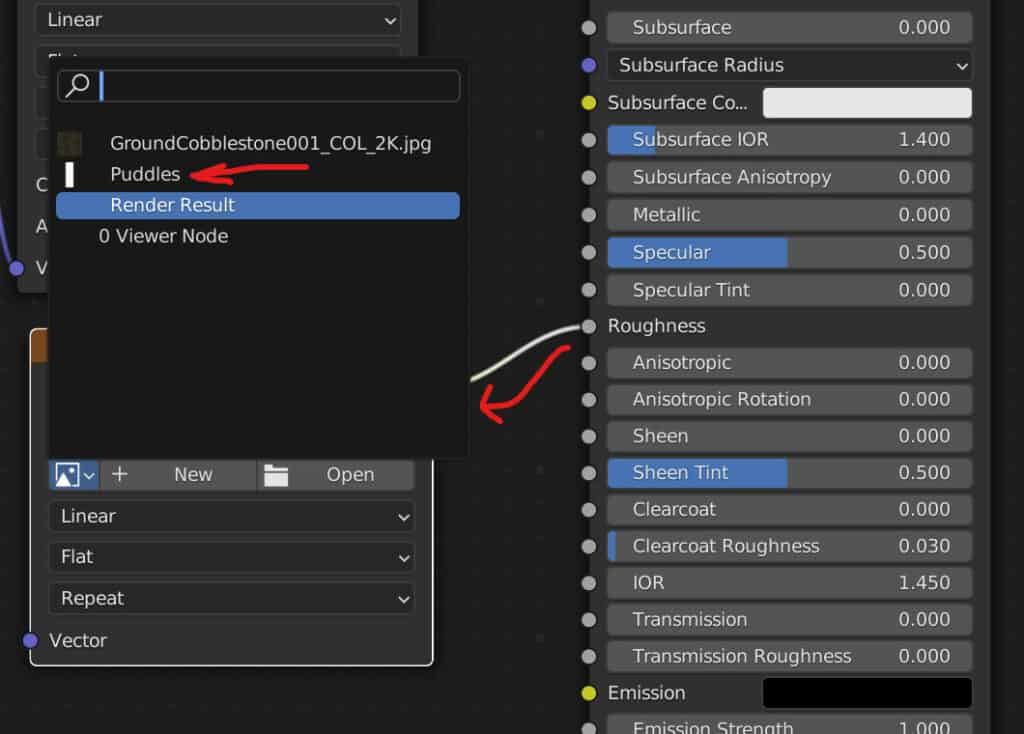
To do this, return to the Shader editor, add a new image texture node, and connect it up with the roughness value of the principled shader.
Click on the little down arrow to bring up the menu that displays all of the imported and created textures in your project, and select the puddle texture.
This won’t change anything initially regarding our material because no changes have been made to the texture map itself, but now we can make those changes and view them within the 3D viewports.
Return to the texture painting workspace, and then we’ll change our base color to black. By default, we have a primary color and a secondary color. The primary color is typically white, while the secondary color is black.

By clicking and dragging on your mouse or by using the pen on your graphics tablets, you can begin to draw using the primary color.
If you hold down the control key and begin drawing, you should use the secondary color. It should be noted that for whatever reason. This does not always work, depending on your version of Blender, which may be a glitch.
For our roughness map, the black color will be the primary color that we will draw with, which is why we want to swap the roles of our primary and secondary colors.
Select the primary color and make it black, and then do the reverse for the secondary color. This way, we do not have to keep using the control key to paint.
Now attempt to draw your puddles onto your white canvas. The color should be easily painted onto your texture map, which will also be displayed in your 3D viewport.
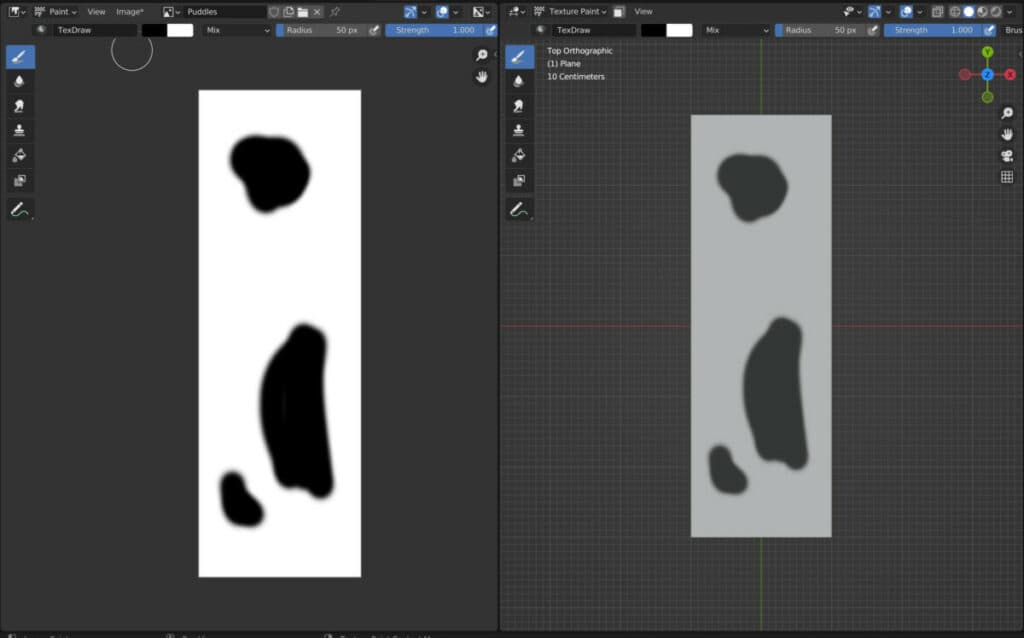
When you create a couple of puddles, return to the shading workspace to view how your texture map has affected your material. You should now see puddles forming on your path or road object.
You can return to the texture paint workspace at any time and use the primary and secondary colors to add or delete areas of reflection that can appear as puddles on your surface.

The ability to change the texture map you use with the paint tools offers a degree of proceduralism to this workflow. You can do so in seconds if you need to make any changes.
Additional Tips For When Using Your Puddle Maps
You can also move about the puddles within your texture map by connecting it up to the mapping node used with the original image texture.
You can combine the location, rotation, and scale transforms found within the mapping node to further manipulate the puddles on your object surface to match the changes made to the image texture.
Alternatively, you can use an entirely separate mapping node to control the puddles of your texture map independently from the base.
One thing to note is when painting puddles onto the edges of your texture map. These edges will be made very visible as soon as you begin to move your puddles around. This results in an unnatural look in specific scenarios.
If you do plan on manipulating puddle positioning using the mapping node, it is suggested to avoid painting on the edges of the puddle texture.

For added realism, we suggest over-laying your paddle map on top of the roughness map you may have for your material. To do this, add in the roughness or gloss map for the material that you are using.
Combine the two together using a mix RGB node and set it to overlay. This way, the entirety of your surface will have the correct amount of roughness, and then the paddles will overlay that surface.
Thanks For Reading
We appreciate you taking the time to read through the article. We hope you found the information you were looking for. If you are interested in learning more about the Blender software, you can check out a few of the articles we have listed below.
- How To Set Up An Image As A Texture Map
- Repeating A Texture Pattern On A Surface Without Seams
- Getting Rid Of Dark Spots On A Texture
- Overlay A Transparent Texture Or Decal
- Painting Transparency Onto Your Texture