When 3D modeling using the Blender software, we can use reference material in the form of images to help improve our 3D modeling workflow. We also have a special type of image known as a background image That is used to help create accurate representations of models based on that background image.
We can change these settings of our background images bike going to the object data properties tab in the properties panel when the Image Object is actively selected. Some settings that we can edit within this panel include the size and aspect ratio of our background image, its opacity, and the ability to view it from different perspectives.
In addition to the tools we have in the properties panel, we also have access to many of these standard tools that are available with any objects created in the viewport, such as the transform tools, which are the location, rotation, and scale of our model.
Adding A Background Image To Our Scene
Before we can edit our background images, we first need to add them. To add a background image to your scene, open up the add menu by either going to the header menu of the viewport and selecting add or by using the hotkey Shift + A.
From here, highlight the image option, and you will have two choices, potentially three you have enabled a specific add-on.
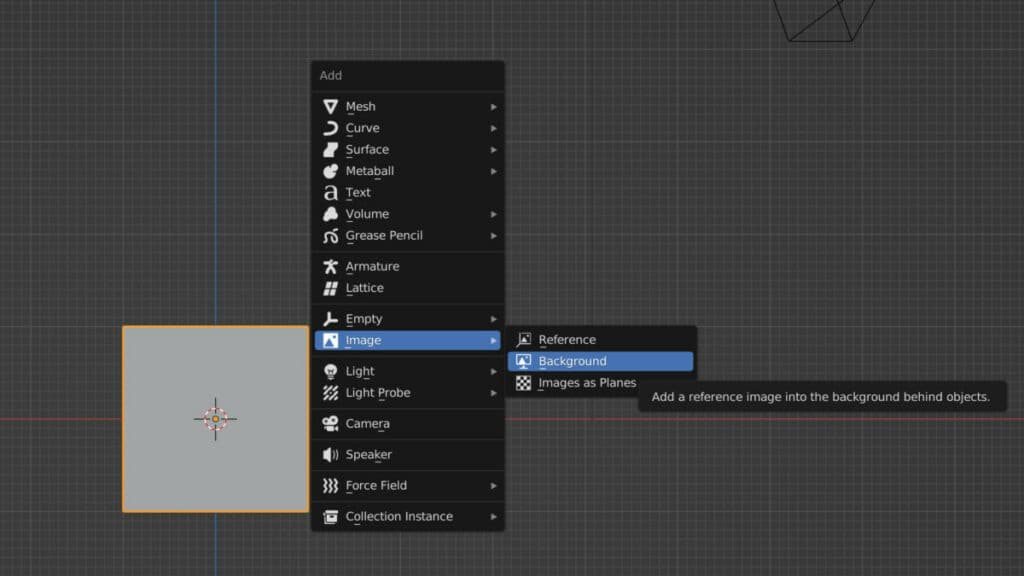
The first of these choices will add a reference image, while the second of these will add a background image. Choose a background from these options.
This will open up the file browser, allowing you to locate your image anywhere on your device. Once you have located it, select the image and then click on the load background images button in the corner, which should appear blue.
The background image will now appear within the 3D viewport, and its orientation will be based on the current view of the viewport camera.
Using The Transform Tools To Position And Size The Image
We can divide the tools used to manipulate background images into two categories. One category of tools is exclusive to our image object types, and then the other set of tools. That is all usable with any object type.
Like any other object, such as the mesh or camera objects, an image is created within the viewports, which means it can be manipulated in 3D space.
We, therefore, have access to the core transforms of an image, allowing us to change its location, rotation, and scale by using any of the methods we can use with other object types, such as the gizmos hotkeys. And values in the side panel.
The primary purpose of the background image is to be positioned behind the object we’re trying to model and use it to create the general shape of our model as accurately as possible.
The background image, therefore, needs to be oriented so that it is directly behind our object. It also needs to be the correct size, or at least for the image on our image plane to be the dimensions we want to quickly create our model and ensure it is the correct sizing.
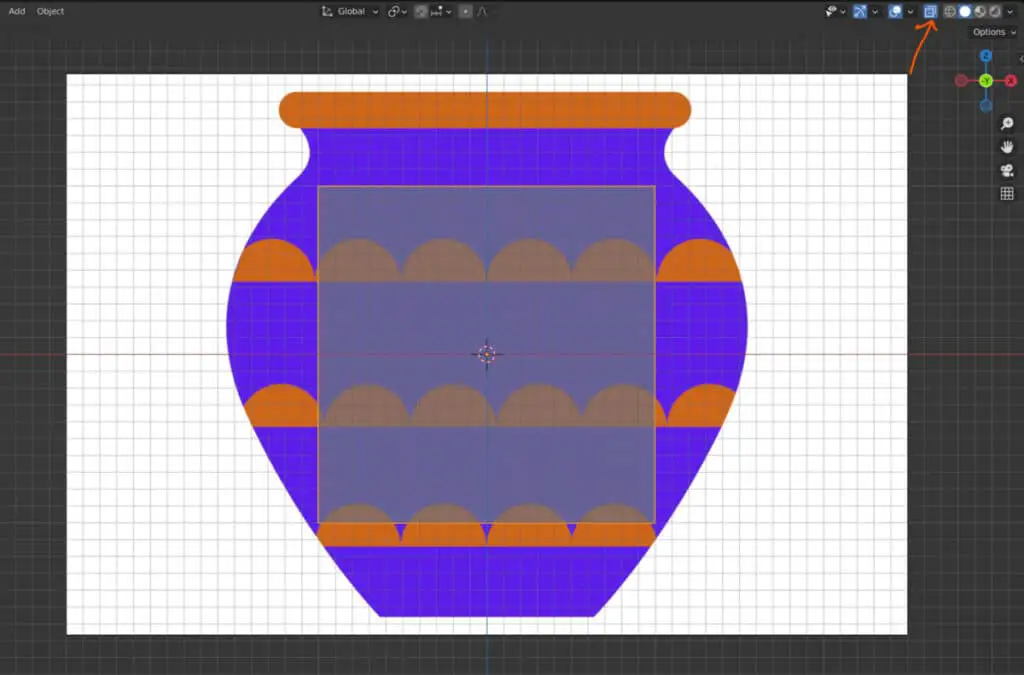
Another little tip here, while creating our setup, is to enable either wireframe or X-ray for our 3D model. This will allow us to see through the model and better work with the background image as we can see more.
The Settings Of The Background Image
The image object type has its own unique tools that are not found with our object types, like mesh objects.
Whenever we want to work with the settings of a specific object type, there will be a special tab in the properties panel where we can access the settings.
This is known as the Object Data Properties tab. And when you have your image selected, the tabs icon will look like an image or a picture with a red highlight.
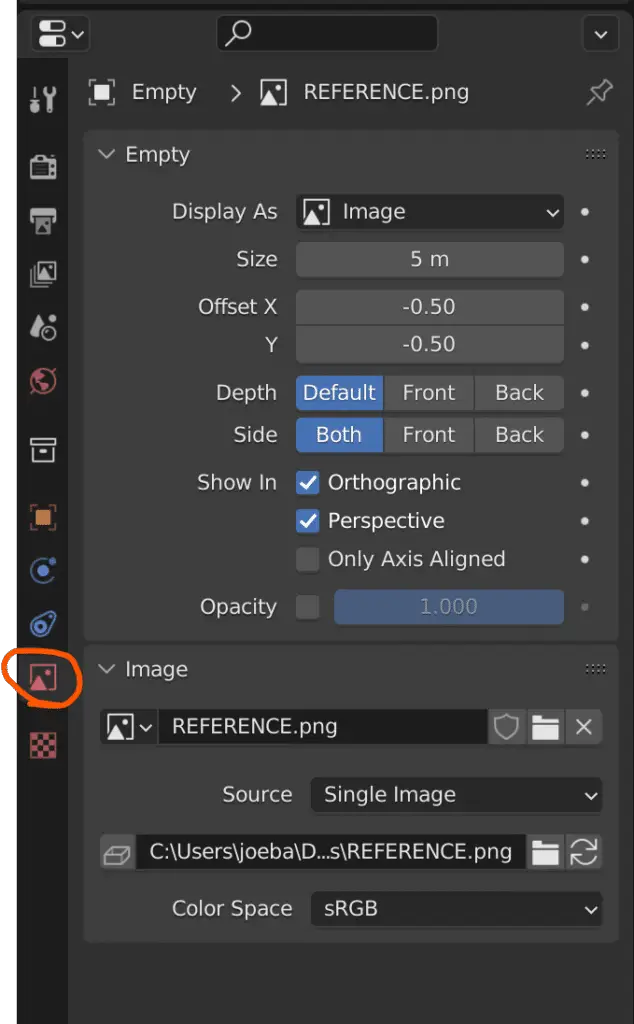
Select this, and you will be able to view all of the unique settings for our image When working with a background image, our settings are divided into two smaller sections.
The bottom section is for the image itself, allowing us to change which image we use as our background. It also allows us to change the default color space of any loaded images.
The ability to edit the image as a whole falls under the empty section. This may confuse you if you are already aware of the empty object type because an image object is actually classed as a particular type of empty.
Like empty objects, image objects can not be rendered. And are primarily only used as reference material. The first option within the properties panel here is the display as an option, which is set to image by default.
If you change this to any other option, then the image will be converted into standard empty objects. It is, therefore, best if you do not change this setting, as there is no reason to.
These size parameters are self-explanatory and will allow you to adjust the overall size of your image.
The offset value moves the image on the X&Y axes from the object origin points. By default, it is set to -0.5, which pushes halfway on each axis into the model’s center. Setting both values to O would position the object origin in the bottom left-hand corner of the image objects.
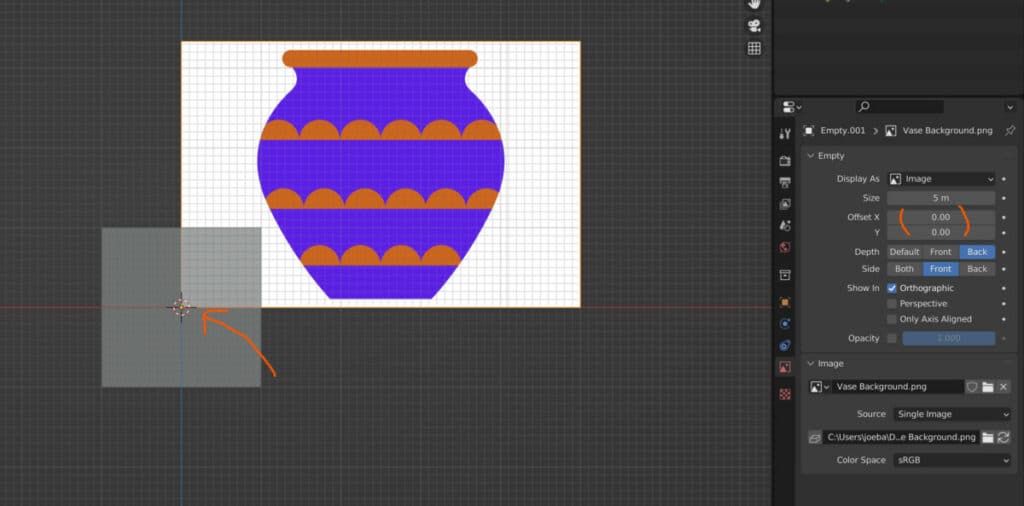
The depth option determines from where the image is going to be viewable. This setting is currently set to back, which means that regardless of where you position your background image, any mesh objects will appear in front of your image. When combined with tools such as the X-ray tool, it is easy to set up Blender so that you can trace the designs from your background images onto your models.
The following setting is the side setting, which determines your ability to view your background image from either the front-facing side or the rear of that image.
For our background images, this is set to front, meaning we can only view the background image from its front-facing side. If we orbit around the back of our image, it will appear transparent.
The next set of options is tick boxes allowing us to show our images from different views. The orthographic option ensures we can view our image from an orthographic viewpoint, such as the front, right, and top views. If we press five on the number pad, we can also transition Into an orthographic viewpoint.
For background images, this option usually is ticked. The next option is the perspective option which allows us to few our images while our viewport uses the perspective mode if you add a background image in an orthographic mode, this box will be unticked.
However, it would be ticked if you were to add a background image with a perspective viewpoint. The third tick box here is the only access align option if you were to add your image in the front. All for graphic view, it would only be viewable from that angle.
You would not be able to view the image from other orthographic views. It is not an option that is necessary to use that often and is usually kept off unless you plan to use multiple background images from multiple angles.
How Is A Background Image Different To A Reference Image
When you choose to add an image for your 3D viewport, you will notice that there are at least two image options. One is for reference, and the other is for background.
Both options follow the same process for locating and loading new images to your 3D viewports, and both appear to be manipulated similarly with the same controls. So what’s the difference between the reference and background image?
The only difference between the two is the default settings. Boy reference image. Everything is set to the standard setting, so it’s available to be viewed from both orthographic and perspective viewpoints. The image can also be viewed from either the front or the back. And its positioning in the viewports dictates whether or not it’s seen in front of or behind a mesh object.
By contrast, when a background image is added into your viewport using an orthographic viewpoint, it can only be feud initially in that orthographic view.
It can also only be viewed from its front-facing side, so when you orbit around, it will appear invisible. A background image is also always going to be behind the primary model. It would appear so even if it is actually in front of the model based on your viewport camera.
However, as we’ve already covered, you can change any of these options at your leisure.
Thanks For Reading The Article
We appreciate you taking the time to read through this article, and we hope you found the information you were looking for. We have several related articles listed below for your viewing if you are interested in learning more about using image files for your blend of projects.