If you are new to animation in Blender, then you may be at the stage where you are using the timeline to create and position the keyframes that create your animations. However, a better tool for manipulating keyframes is the dope sheet.
The Dope Sheet is the primary panel in Blender where we can edit the positioning of our keyframes. It is where we can locate all the keyframes we have created. We can do everything in the dope sheet in the timeline, with the added benefit of isolating the various channels of our keyframes so that we can edit at any level.
By learning the fundamentals of the dope sheet, you will be able to improve your ability to animate in Blender and your general understanding of how animation functions.
Setting Up Your Scene With The Dope Sheet
The dope sheet exists as an editor type similar to the timeline. You can change any of your existing panels by clicking on the menu button in the top corner of that panel and then selecting dope sheet from the animation category.
A more straightforward method, though, is to use the animation workspace. The tab for the animation workspace is visible in the header of the Blender user interface. Left-click, and you will have all the editors necessary to create basic animations.
Included here will be the timeline at the bottom, the dope sheet directly above it, two viewports with one viewing our seen through the camera lens, the outliner panel, and the properties panel.
The Difference Between The Dope Sheet And The Timeline
When we first look at the dough sheet, it appears very similar to the timeline. It’s a place where we can view the keyframes we have applied in our scene. However, there are several key differences and reasons why you would choose to use one instead of the other.
The timeline offers a preliminary view of the keyframes added to selected objects. More importantly, it has playback controls that allow us to play, fast forward, rewind, and pause our animations within the 3D viewport.

We also can define the frame range within the timeline. This is another tool that is not accessible within the dope sheet. So what is the dope sheet actually for?
The primary purpose of the timeline is to preview the animation itself, while the dope sheet is designed to manipulate the keyframes used to create that animation.
In the timeline, we can select general keyframes, such as the location of our object, and then we can grab and reposition those keyframes.
In the dope sheet, we can do everything possible in the timeline regarding selecting, deleting, and duplicating our keyframes. Still, we can also use additional keying tools and manipulate the various channels of our animation.
Reading The Data Of The Dope Sheet
You can access the hierarchy of your created keyframes to the side of the dope sheet. Whenever we add a keyframe, a new hierarchy is generated so that we can control that keyframe at various levels.
For example, we can create a keyframe for the location of a mesh object. To the side of the dope sheets, a new hierarchy labeled as summary would appear with the key frame that has been added.
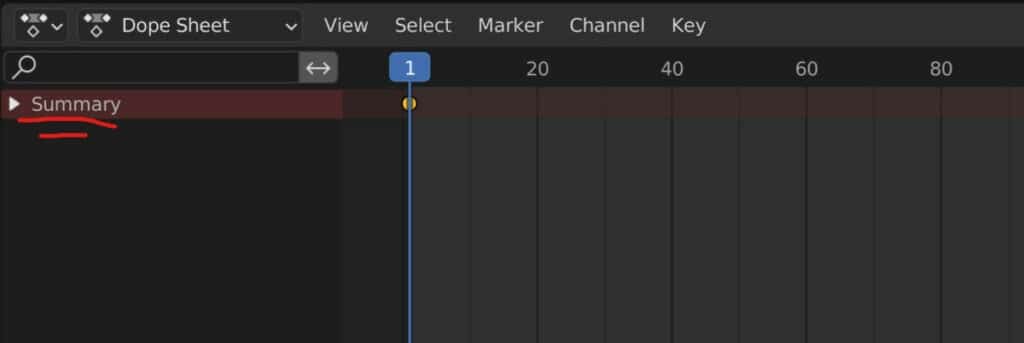
You will notice there’s an arrow next where it says the summary. If you don’t see this area on the dope sheets, press the T key to open up the summary panel.
When you press the arrow next to the summary, the hierarchy will open up, and you will be able to few in more detail what the keyframe represents.
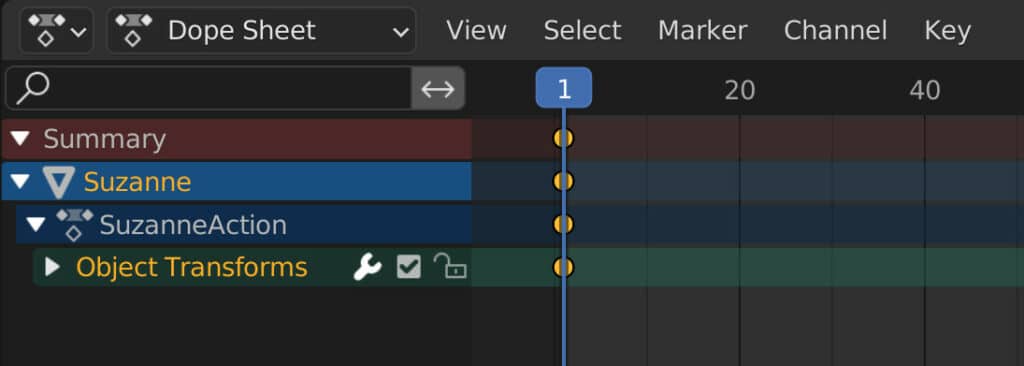
We can see here that this keyframe is made for the mesh object Suzanne, and if we go one level down in this hierarchy, we can see that we are acting with this object.
The next level down tells us what that action is: an object transformation. If we left-click on object transforms, we’ll be able to see in more detail what transforms are affected by this keyframe.
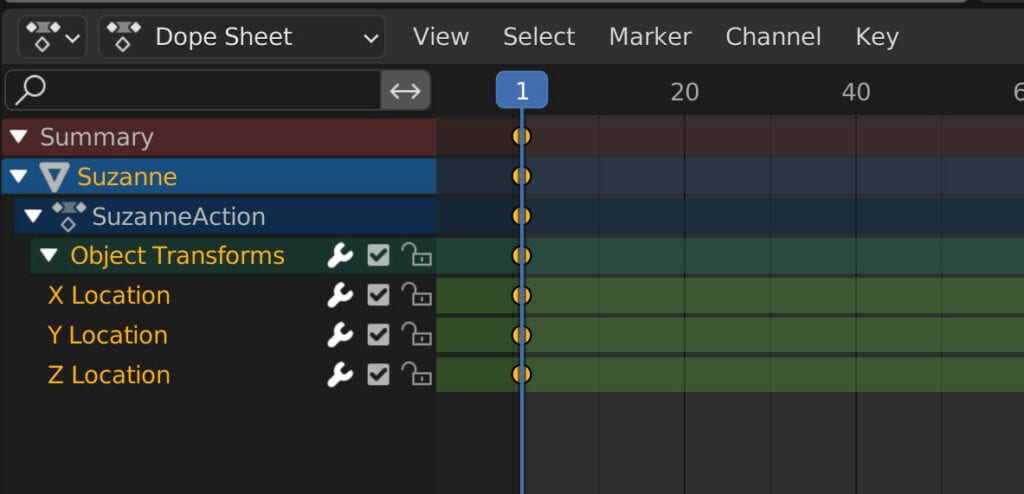
In our example, we concede we have created a keyframe for all three axes of the location transform. Some additional options here allow us to toggle the usability and visibility of these keyframes.
The first two options were later known as the F Curve, which is used to manipulate the behavior of our keyframes. The third option, an open lock icon, allows us to prevent any changes to these properties when we add more keyframes.
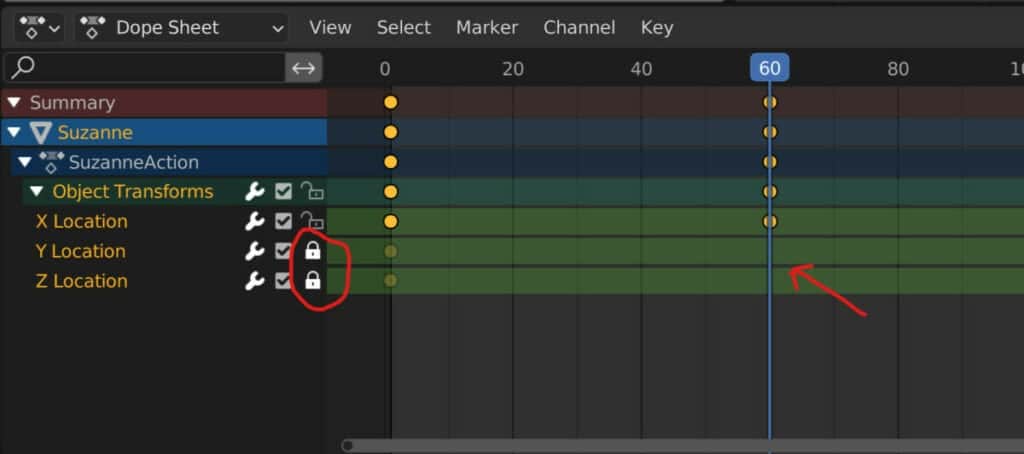
For Example, let’s say we were to move our object on all three axes but only want to move it on the X-axis.
We can lock the Y and Z transforms by clicking on the icons in the dope sheet. Then when we insert our keyframe for the change of rotation, any alteration to the locked transforms is canceled.
Grabbing And Moving Keyframes In The Dope Sheet
When of the more fundamental tools in the dope sheet is the ability to select and move a keyframe to a new position in the timeline.
Selection works based on the hierarchy, so selecting the Summary keyframe selects everything underneath it.
Below is an example where the keyframes have been added to all three location transforms.
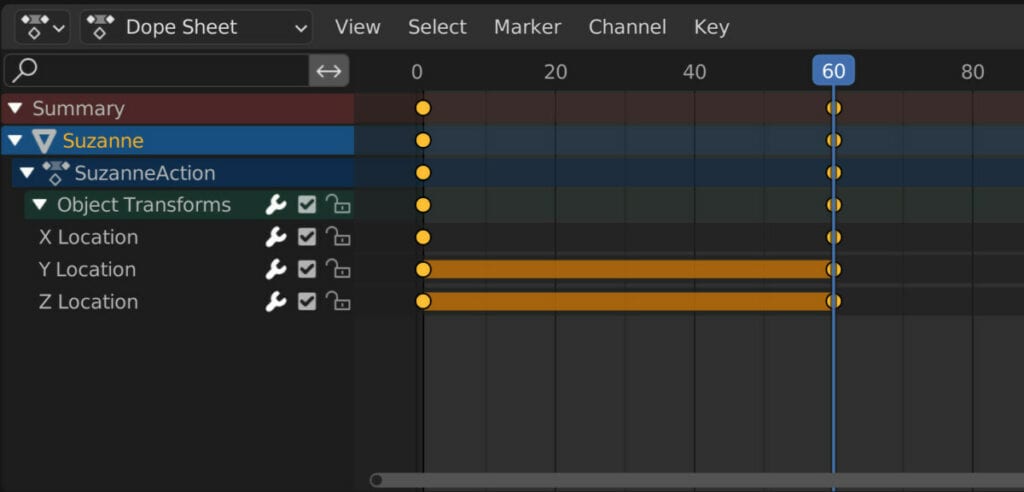
You may notice a highlighted line on the Y and Y keyframes. This indicates that no change has occurred between these axes’ start and end keyframes, which are the same value.
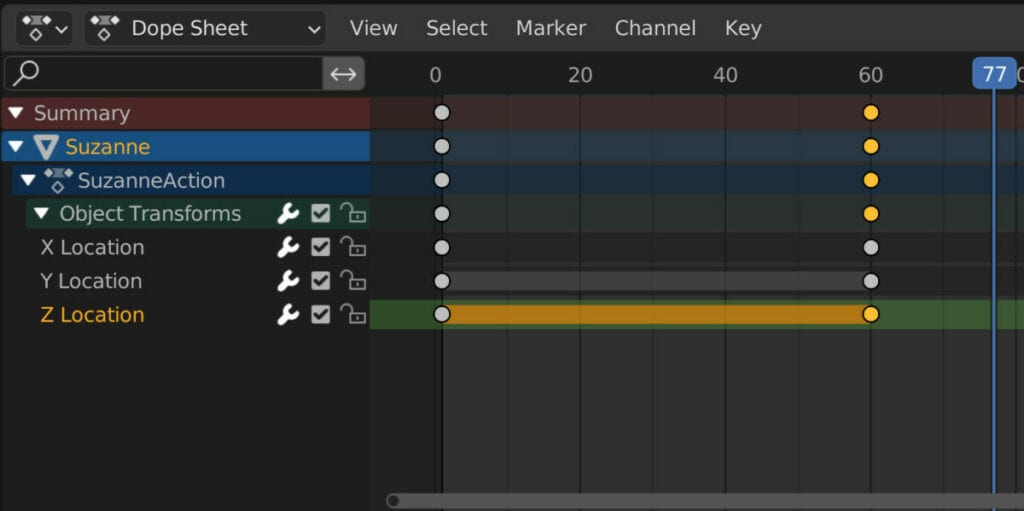
We want to move the Z location keyframe to frame 30. if we select the end keyframe for the Z location, it remains highlighted yellow, as do the keyframes higher up in the hierarchy on that frame.
However, all keyframes not connected to that one, such as the X and Y locations, and all keyframes on frame 1, appear white to indicate that they are not currently selected.
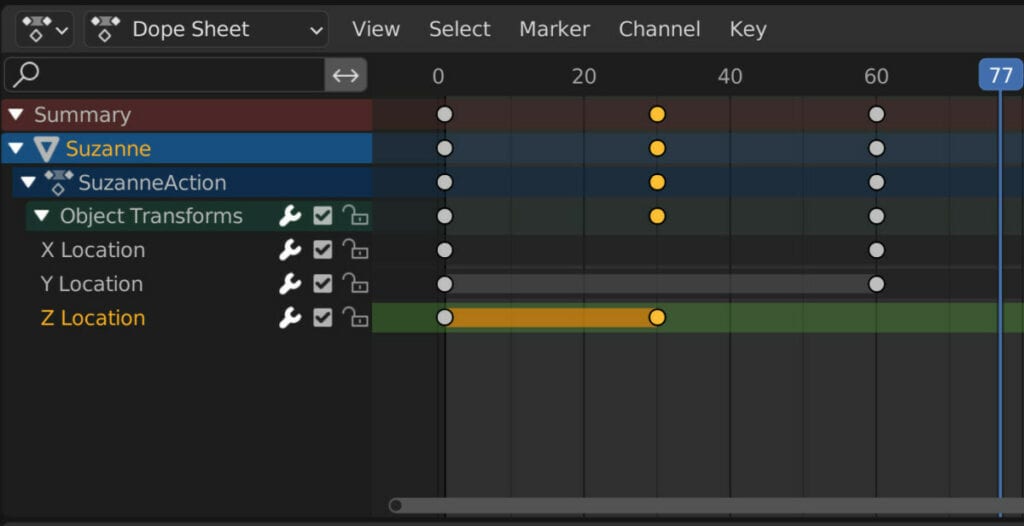
Like in the 3D viewport, we can press the G key to grab and move the active element. In this case, the active element is the Z location keyframe.
We can move it anywhere within our frame range, such as to frame 30.
We can then create a new keyframe at frame 60, ensuring that it is the active frame; we can grab our object and move it up on the Z axis so that the object begins to rise. However, when we add this keyframe, we only want to introduce it to the Z location.
Adding the keyframe in the viewport overwrites the existing keyframe data on that frame. To only add a keyframe to the Z location, press I in the dope sheet and then select only select channels.
Deleting Keyframes
Another essential tool we can use in the dope sheet is the delete tool. Any element that we can create in Blender we can also delete.
Deleting a keyframe is just as easy as it is to delete an object. Select the keyframe in the dope sheet and then press the delete key to remove it.
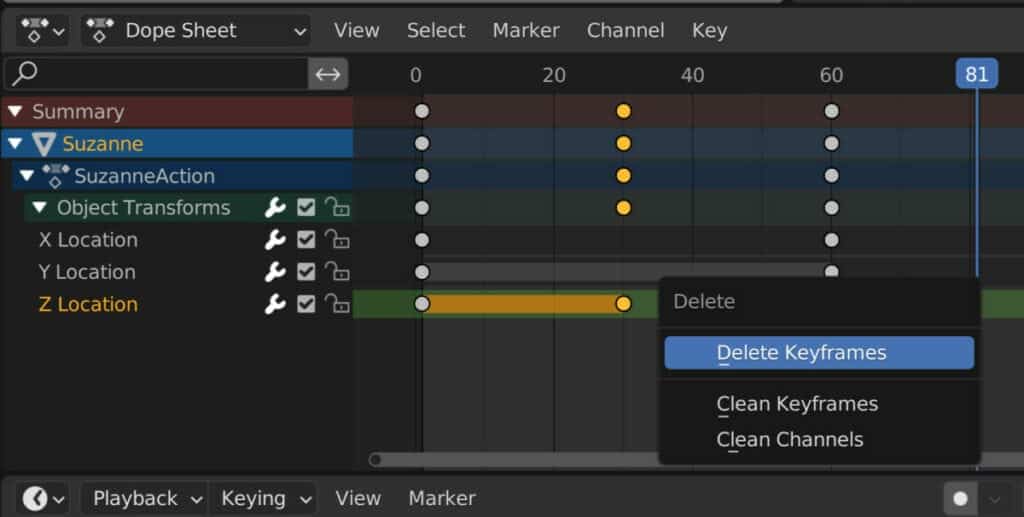
Keep in mind that this still follows the keyframe hierarchy. If you only want to delete the keyframe for a single channel, like the Z location, then ensure you select the keyframe on that channel.
There are two more options here for cleaning your keyframes and your channels. For more information regarding these tools, look at the article here.
Duplicating Keyframes
In addition to the fundamental abilities to select, grab and delete our keyframes, we can duplicate them.
When a frame is duplicated, it inherits the same values as the original. There are two use cases for creating duplicate keyframes.
One example is maintaining a specific value for a particular time, such as when creating a bouncing object where we want the object to press against the ground for a couple of frames before it bounces up.
Another use case is to revert your animation to that position at the end of the animation itself. We can duplicate our X keyframe and extend our animation with our example.
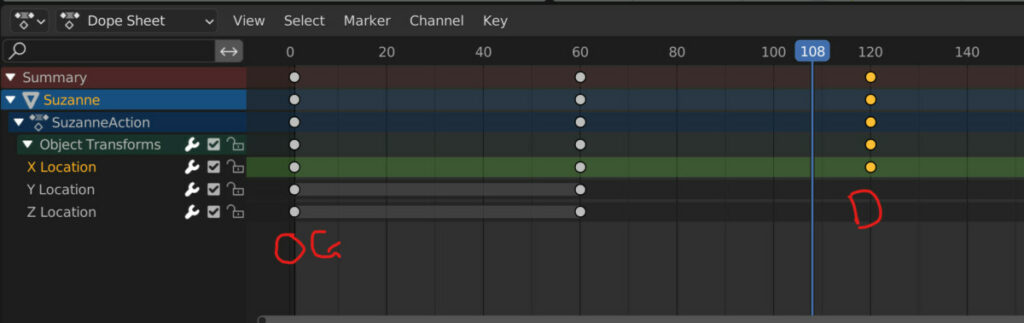
Select the channel you want to duplicate, use the duplicate hotkey Shift + D, and then drag the duplicated frame where needed; for our example, frame 120 is a good spot.
Thanks For Reading
We appreciate you taking the time to read through the article. We hope you found the information you were looking for. If you are interested in learning more about the Blender software, you can check out a few of the articles we have listed below.
- Manipulating Channels In The Dope Sheet
- How To Edit Keyframe Behaviour In The Dope Sheet
- Using The Graph Editor (Beginners Guide)
- Can Blender Do 2D Animation
- Getting Started With 3d Animation In Blender