3D artists have various object types to use when modeling their 3D scenes. One of the most powerful but also most confusing objects to use is the empty.
The empty is a type of object that will not appear in any 3D renders and is primarily used to influence the behavior of other objects like mesh-based objects. Empties can be used for tasks such as texture painting, or they can be used as the pivot point for multiple objects.
You are unlikely to know what an empty is used for unless you have seen someone else actually use it in their projects. However, there are a wide variety of functions that are applicable to using empties, so let’s take a look at how we can use this object type in Blender.
What Are Empty Objects in Blender?
When you press the hotkey for the add menu, you will be greeted with a wide variety of object types, and each object type has its own set of functions and capabilities.
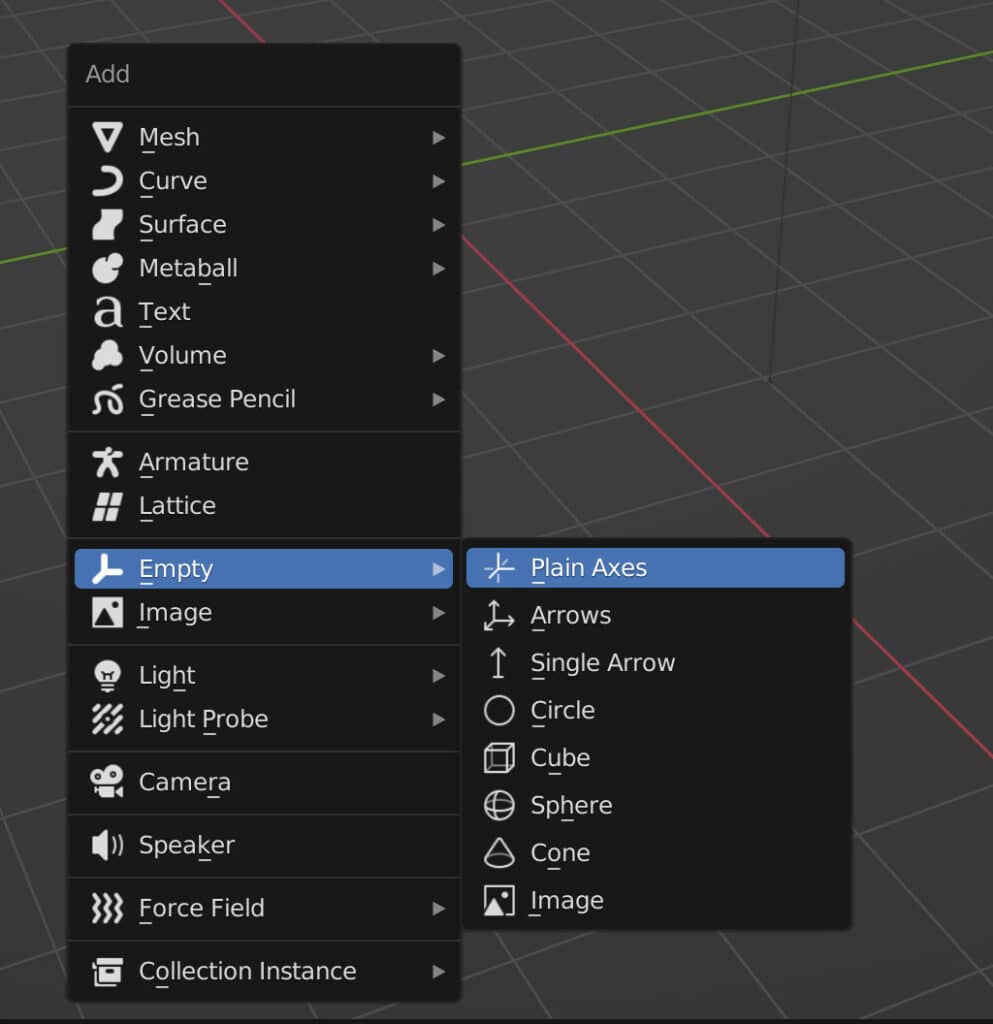
One such object type is the empty. This type of object is often used in conjunction with other object types, such as mesh objects or even light objects. When you open the add menu, you can locate the empty objects menu halfway down the list.
There will be multiple options for the type of empty object you wish to add. However, it should be noted that unlike other object types, such as the mesh object, the actual shape of your empty does not have much bearing in terms of its functionality.
You do have numerous options here, such as the ability to create arrows or even cone shapes for your empty objects. There is a reason why these variations exist, but the general purpose of the empty will remain the same regardless of which one you choose.
For example, let’s say you were to add these standard axes empty type into your scene. Open up the operator panel and see that we have some options for positioning, rotation, and alignment.
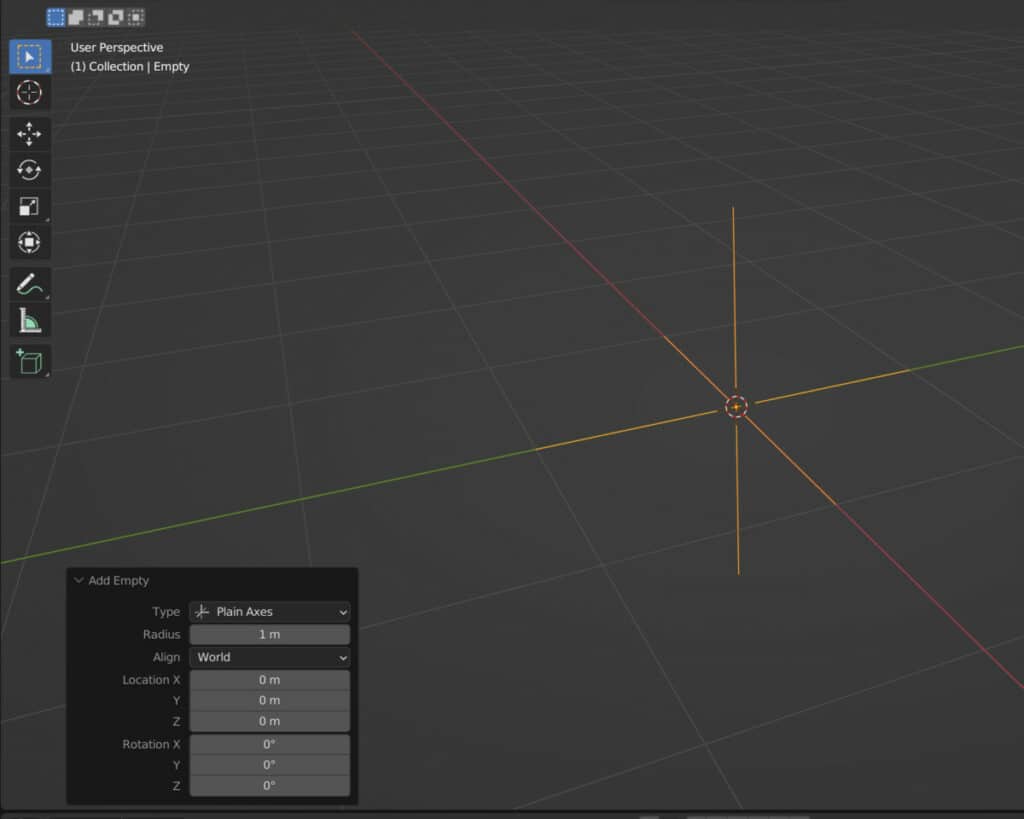
The first option in the operator panel is to change the type so you can actually switch between all of the various different empty shapes from the operator panel even after the empty has been added in. If you cycle through these shapes, you will notice that none of the other properties in the operator panel change. It’s the same regardless of the shape that you choose.
In terms of appearance, all empty objects appear as wireframes, even the ones that represent solid objects, such as the cone and cube shapes, only appear as wireframes.
You can adjust the radius, representing the size of these empties, and determine the alignments. By changing the alignment, you can determine if you want the axes of your empties to follow the blender world or if you want them to focus on the viewpoints or the 3D viewport. You can even align the empty to match the rotation of your 3D cursor.
Beyond that, we can control simple properties such as our empty objects’ default location and rotation. But aside from the simple positioning of an empty, what can we do with this type of object?
Parenting Objects To An Empty For Control
A beginner-friendly method of using an empty is to have it act as a parent object to control mesh models within the 3D viewport.
Let’s say you have two mesh objects and one empty object within your 3D viewports, as seen in the image below.
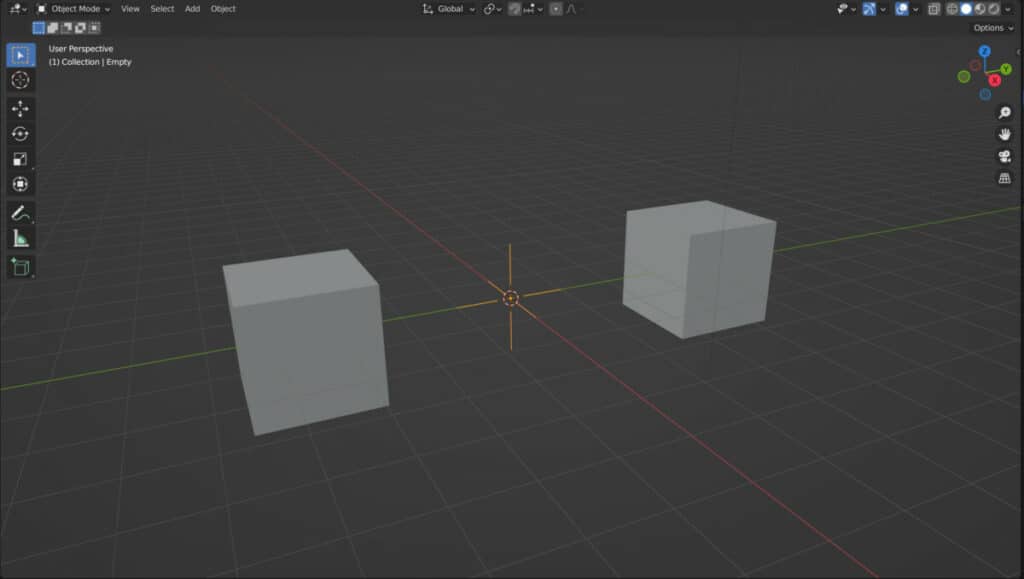
Select the two mesh objects first, and then select your empty object. Pair the mesh objects to your empty by using the hotkey Control + P. Then select Object from the menu that appears.
This will parent your mesh object to your empty, much as it would normally do when you parent with mesh objects. The last object is the one that is going to be the parent, and the other objects within that selection will act as the children.
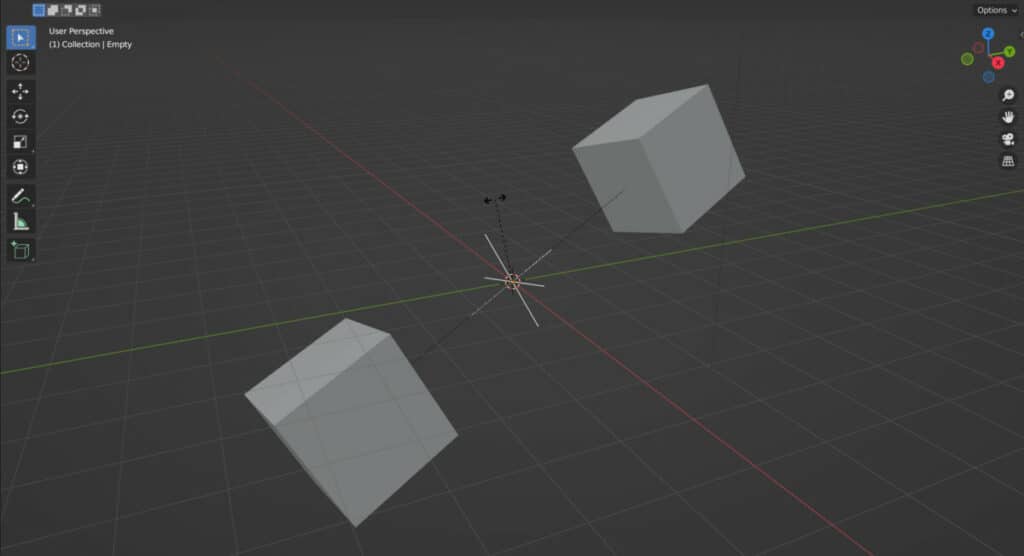
Now we only need to grab, rotate and scale the empty objects to manipulate those values for the children. This is great if you want your objects to orbit around a point of reference, but you don’t want that point of reference to be visible in your 3D viewports or your rendered scene.
Are Empties Rendered In Blender?
They are called empty’s for a reason: there is nothing of these objects in a material sense. Therefore, like lamp objects, these empties will not be rendered in your scenes. However, the impact they will have on other objects will be visible within the scene.
Even if we were to use one of the shapes that resembled that of a 3D object, that empty would still not be rendered in Blender because it has no actual geometry. It’s merely drawn to resemble the shape of a 3D object.
Why Are Empties So Valuable In Blender?
The ability to use empties in Blender is a valuable asset to any 3D artist because of the versatility of what an empty is able to do within the 3D viewport.
It can offer a level of functionality that would be otherwise inaccessible to an artist. Empties are primarily used to influence the other object types within your scene. They can do this without themselves being rendered in.
The final result is the same as having an invisible force impact the objects you create, only you have complete control over what this invisible force does.
Using An Empty To Control Modifier Behaviour
Certain modifiers require control objects to determine the orientation or direction that the modifier will affect the main model. Empties work very well as control objects in this case. This is because empties are invisible to our renders, but we can use them to influence the behavior of other objects through modifiers.
An example of using an empty as a control for a modifier would be with the array modifier. In the example below, we have a cube that has been generated as an array. Let’s say we wanted the right to follow a circular motion around a single point. That single point could be empty.
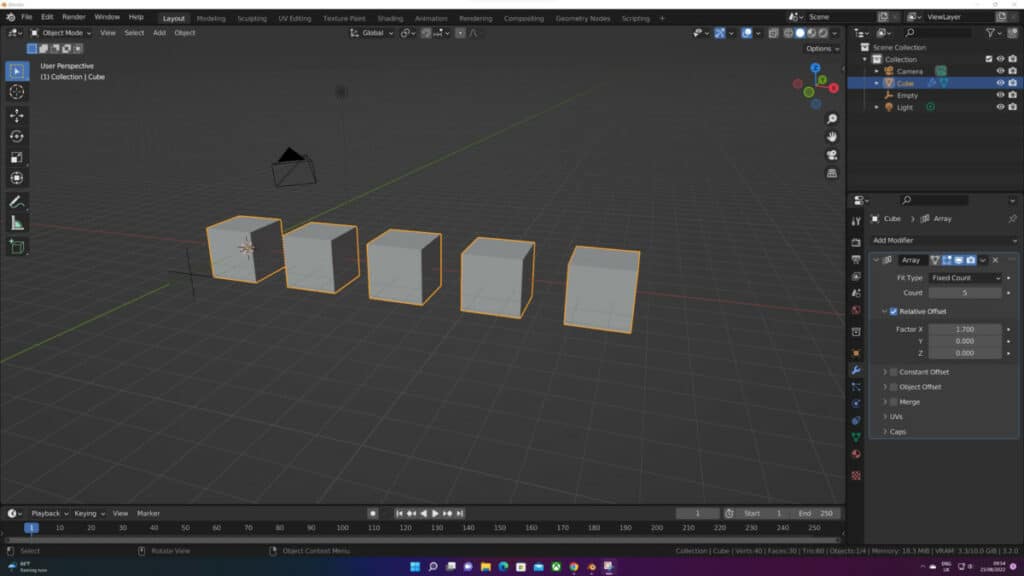
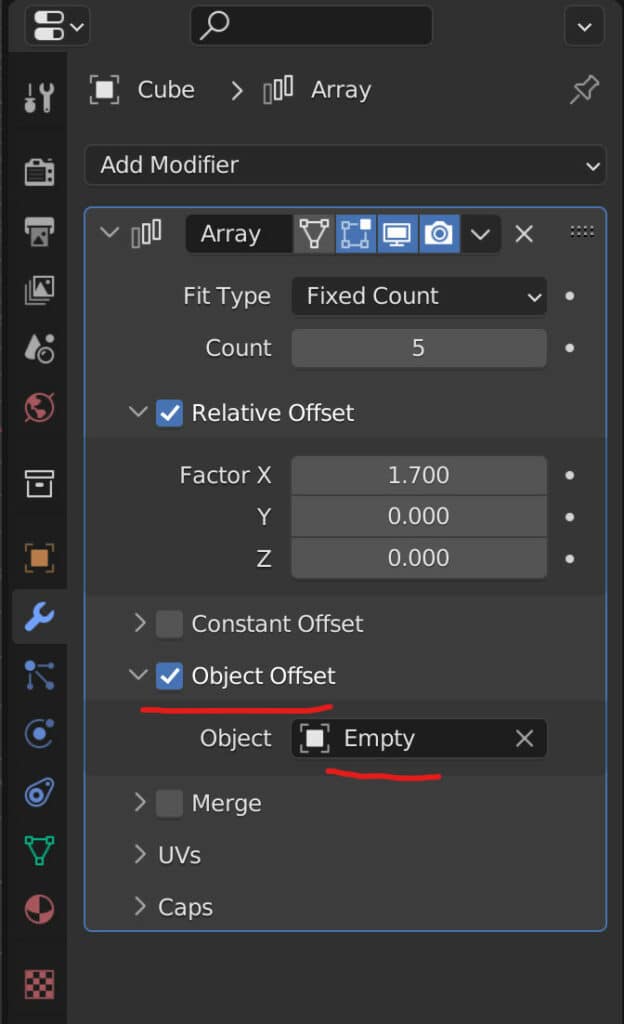
To use our empty as our control, we would need to turn on the object offset option within the array modifier.
Then we would need to open up this part of the modifier and left click on the blank space and select our empty objects. Of course, we need to add the empty into our scene before this can work.
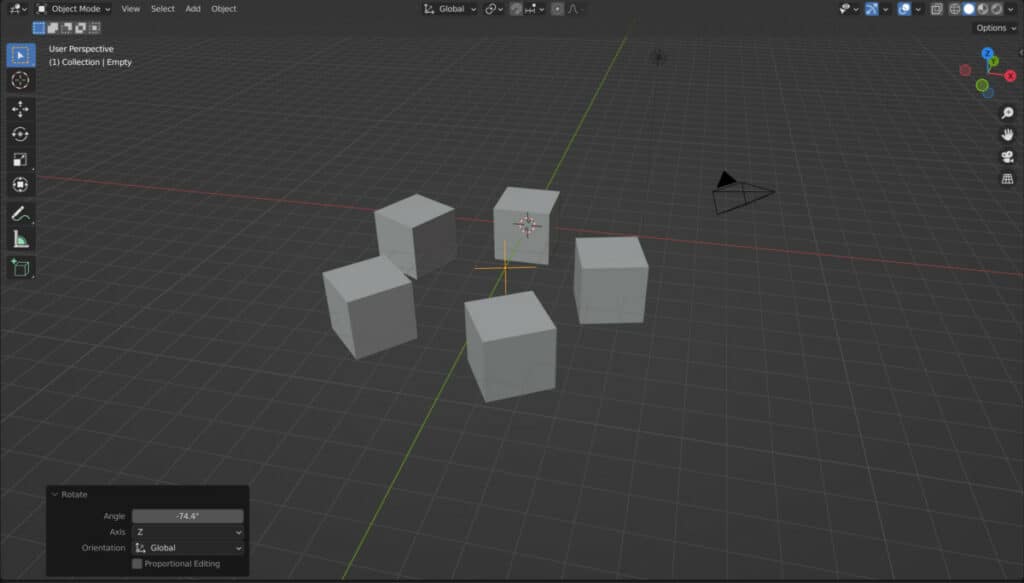
Once we assign the empty as our objects offset, then the behavior of the array changes. If we grab and move our empty around, we change how the array is manipulated.
If we were to then rotate our empty object on the Z axis, we would be able to orbit our cubes around our empty. This would create our target shape of a circular array of cubes.
Using Empties For Animation
Because we cannot render an empty object, we are unable to animate that empty, as the prerequisite of being renderable is not met.
However, like other nongeometric objects such as cameras and lamps, our empties’ influence on the scene can be animated.
Let’s take a couple of our previous examples above and create an animation. With the empty that we used for the array modifier, we can move it up and down on the Z axis to control the position of the array.
By adding keyframes to the empty Z location, we can animate the array’s position on the Z axis.
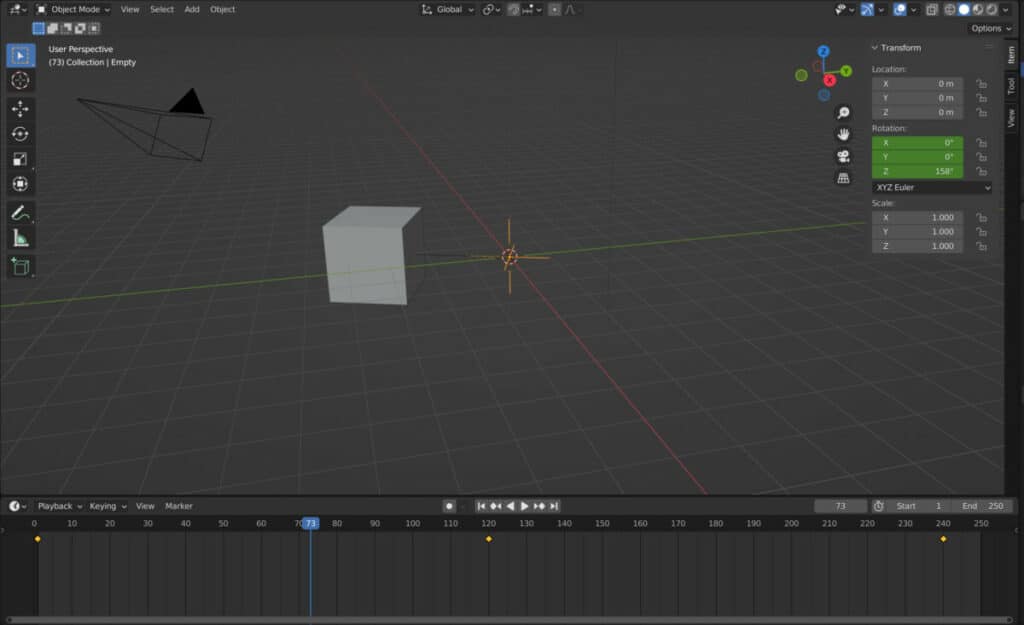
We can also animate using the empty as a parent, for example, creating a second empty, setting that as the parent to the cube, and then manipulating the rotation value.
Thanks For Reading The Article
We appreciate you taking the time to read through the article, and we hope you found the information you were looking for. Below we have compiled a list of additional topics that we think you may be interested in reading.
-
Edge Loops for Hard Surfaces in Blender
Utilizing edge loops for defining crisp hard surface details in Blender.
-
Blender Kitbashing: Complex Shapes Made Easy
Simplifying complex shape creation with Blender’s kitbashing approach.