Geometry is constructed using three types, which are the building blocks for all mesh-based models. These three types of geometry are vertices, edges, and faces. An issue that beginners may face is the fact that you can see all these individual pieces on your model, so it looks blocky and flat. When light bounces of the faces, for example, it reflects differently on each face, making them all clearly visible.
Smooth shading is used to change the way the light hits the surface of the object, both in the viewport and in the renders. With smooth shading, an object can look more like its real counterpart as the individual faces no longer become distinguishable from each other. Autosmooth is a form of smooth shading that grants control of where to shade smooth based on edge angles.
Despite not being the most talked-about skill in 3D modeling, smooth shading of your objects are in most cases a mandatory part of the process for creating the look that you are after for your models or scenes.
A Comparison Between Flat Shading And Smooth Shading
There are two kinds of shading in Blender, the default flat shading method and the more realistic smooth shading method. So what is the difference between these methods and in what situations should you use either of them?
Flat shading is the default method of how the light hits the surface of your geometry and allows you to perfectly view all of the geometry on your model.
This type of shading is best suited for the modeling stage of your project, where you need to be able to view the structure of your model both in object and edit mode, although the type of shading does not make much difference to the editing workflow while in edit mode.
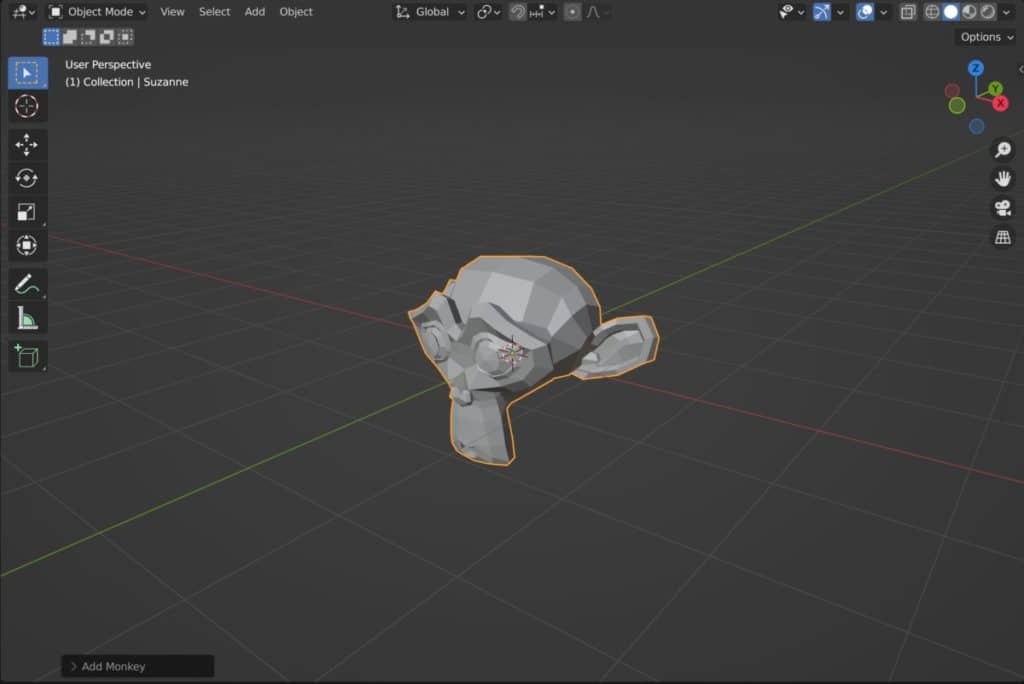
The image below is of the monkey mesh in its default form without any changes. You can see each individual face as a slightly different shade.
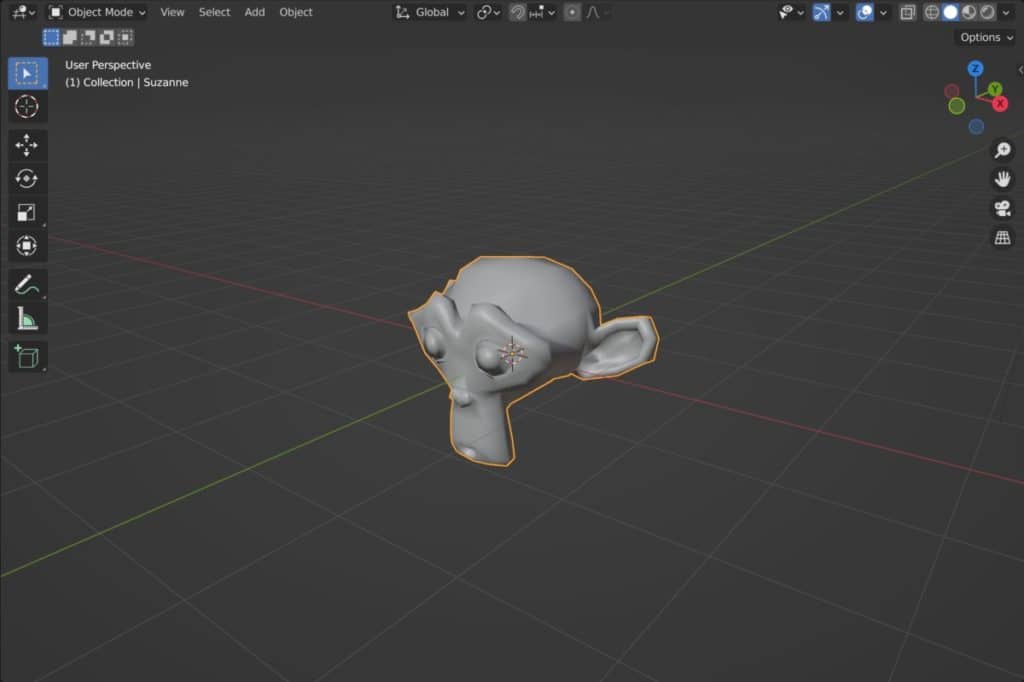
By comparison in the next image we have the same object but with smooth shading applied. Here the faces are not individually visible and the lighting merges to make the appearance of a single smoothed surface.
Smooth shading does not affect the geometry in any way despite its appearance. What it does is add what is known as the smoothing attribute to the mesh object.
This attribute interpolates the normals of the geometry to give the illusion of a smooth surface, however, this interpolation again does not change the object’s normals when manipulating other tools.
Effectively, all smooth shading really is in modeling is a trick of lighting, to imitate more geometry-dense, curved models. This is not full proof, however, as the outline of the model will still appear jagged if it is low poly. This can only be corrected by increasing the amount of geometry that you have.
When To Use Smooth Shading Over Flat Shading?
As stated, it is often better to keep flat shading while you are constructing your objects so that you can always see the structure of your models as you are working on them.
Another scenario where flat shading may be preferable is as an art style for something like game design. There are an increasing number of titles that follow this low poly art style in which you can literally see your geometry as a part of the overall aesthetic.
By contrast, the smooth shading method is often used in just about every other scenario. It represents more realistic lighting effects on objects and so is an important tool for objects that are designed for games, animations, and architecture to name a few.
How To Use Smooth Shading On An Object?
Despite the fact that you are very likely to require the tool, smooth shading does not have a hotkey assigned to it by default and so you can only reach the tool by going to the appropriate menu.
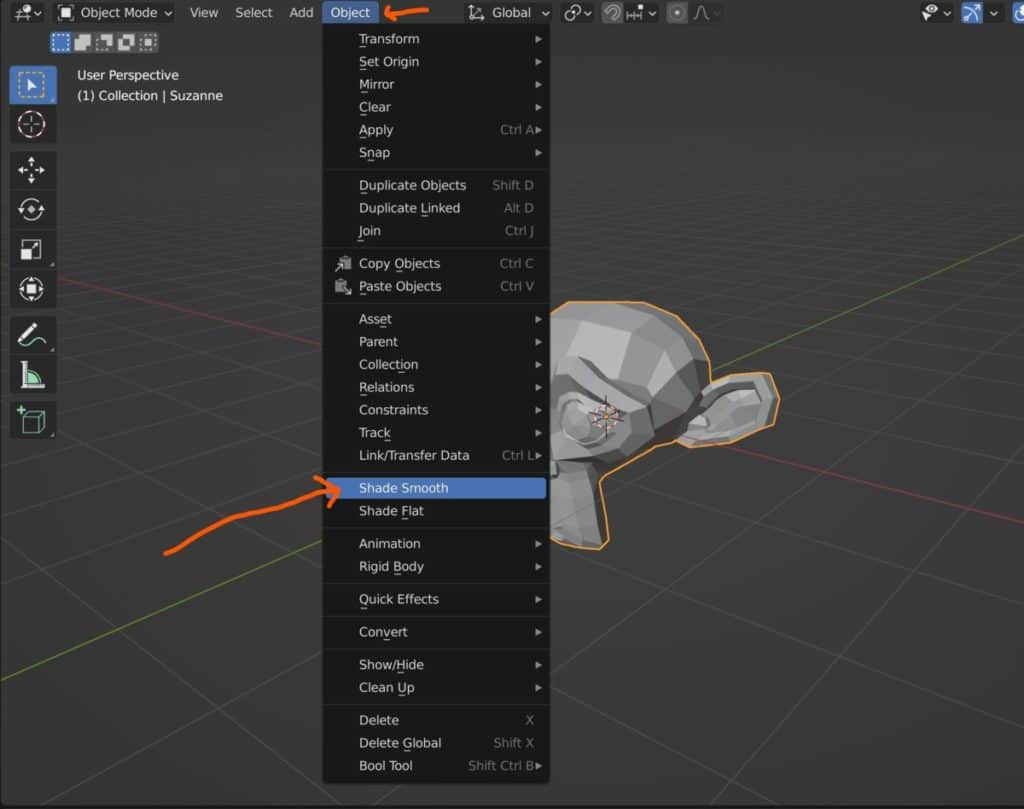
In object mode, go to the object menu found in the header bar of the 3D viewport. About halfway down this menu, you will find the options for shade smooth and shade flat. Select the shade smooth option to apply smooth shading to the model.
Consider these shading methods to be two sides of a boolean. Your model can only be one or the other, either as a flat shading model or as a smooth-shaded one. These tools do not other much control beyond that.
Smooth Shading On Objects With Sharp Edges
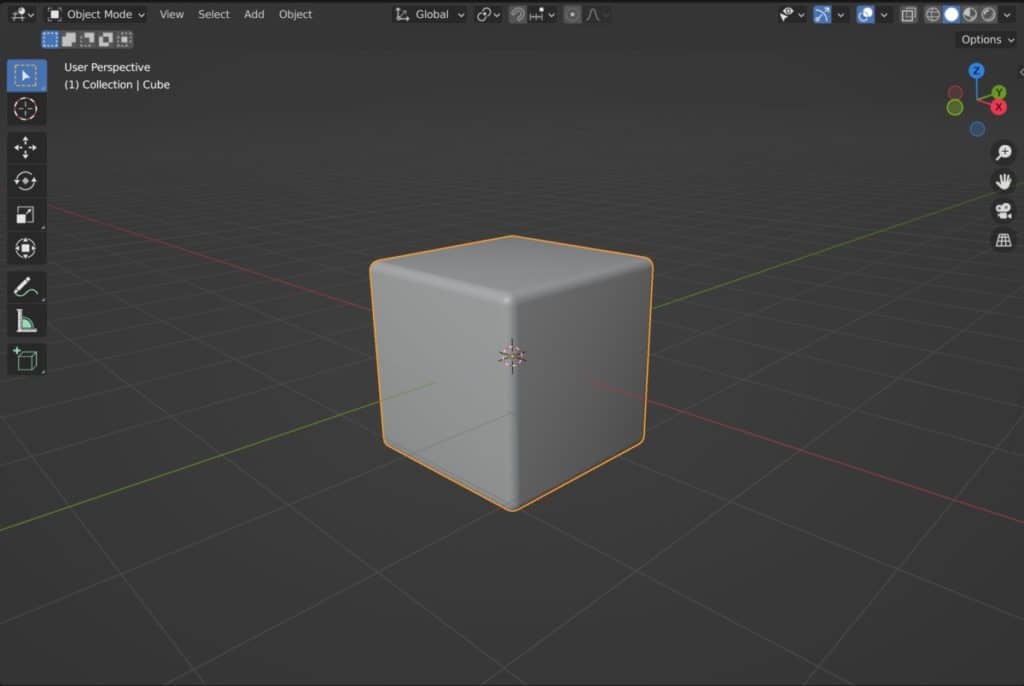
Most objects that you create will have a combination of sharp edges and smooth ones, but smooth shading does not play well with both kinds. In the real world, there is no such thing as the perfectly sharp edges that you always see in Blender. For example, the cube in its base state could not exist as a real object with those infinitely sharp edges.
Smooth shading requires that the object follows the simple principle that all edges need to have some level of curvature, which is often applied using the bevel tool.
Below are two images, the first of which shows the cube in its base state with smooth shading applied to it, and no other change to the geometry.
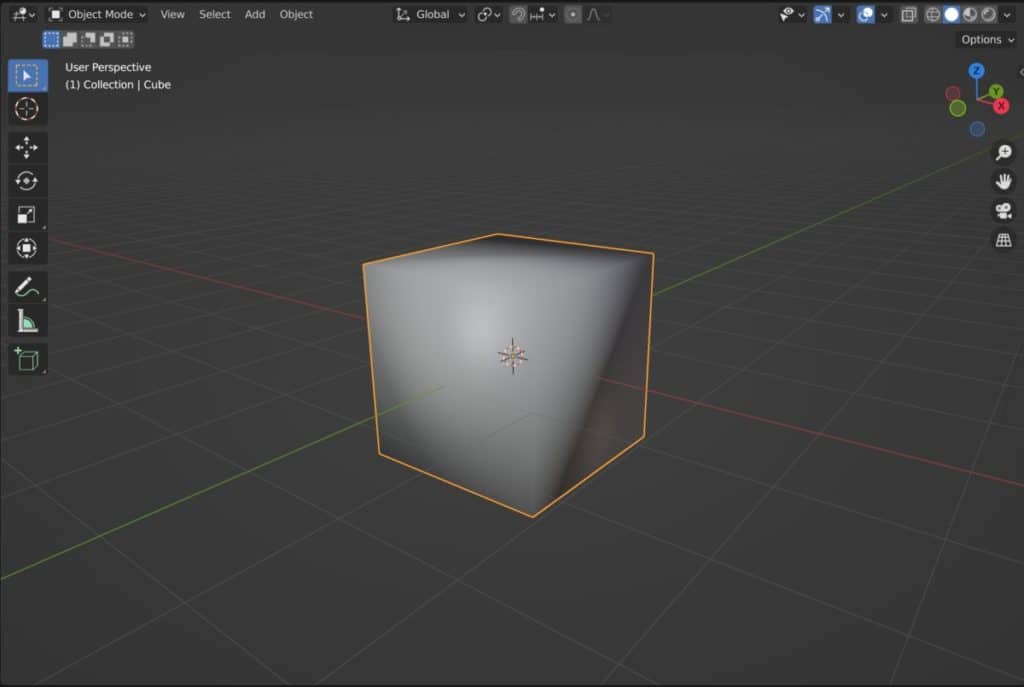
You can see that the shading appears weird in the viewport because the angles around the edges are too sharp and Blender struggles to dictate how the object should receive the light in the scene.
In the second image, a bevel modifier has been applied to the same cube. Again smooth shading is in effect but this time shading of the model looks a lot more natural even on the larger flat areas of the cube.
Pay attention to the structure of your model and what is to be used for. Does it require smooth shading in order to look how it is expected to? and if so how much geometry needs to be added to make sure that the shading appears correct.
Of course, there are also many objects that you create that will have both sharp and soft edges to the design, and in that case, neither solution for shading will work for the entire model.
We, therefore, need a solution that offers more control over how the smooth shading is applied to the model.
Using The Autosmooth Tool Instead
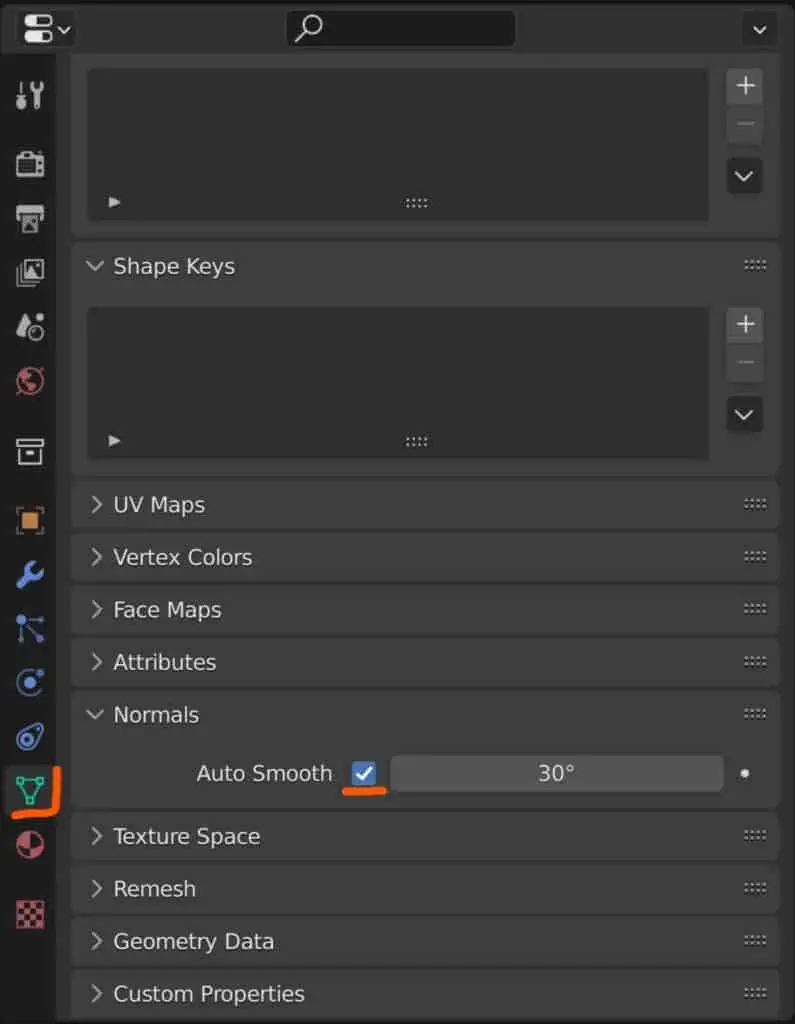
An alternative is to use the auto smooth tool which is found in the properties panel. The idea behind the auto smooth is to offer more control than just applying smooth shading to the whole object.
Before we enable auto smooth, we need to highlight that this is not a replacement for the smooth shading tool, but rather an extension of its functionality.
Therefore in order for the auto smooth tool to work, smooth shading needs to be applied to the object in question. Once you have activated smooth shading, go to the properties panel and then go to the object data tab, which has the icon of an upside-down green triangle.
In this tab, you can control things like assigned vertex groups on your model, but we are looking for the Normals section found halfway down the list.
Open up the section and you will see a tick box for the auto smooth tool, so select the tick box to activate auto smooth on your model.
For something as simple as a cube, the auto smooth tool almost seems to cancel out smooth shading, so below we use a UV sphere to show how this works.
The first image shows the UV sphere with smooth shading applied but the auto smooth tool turned off.
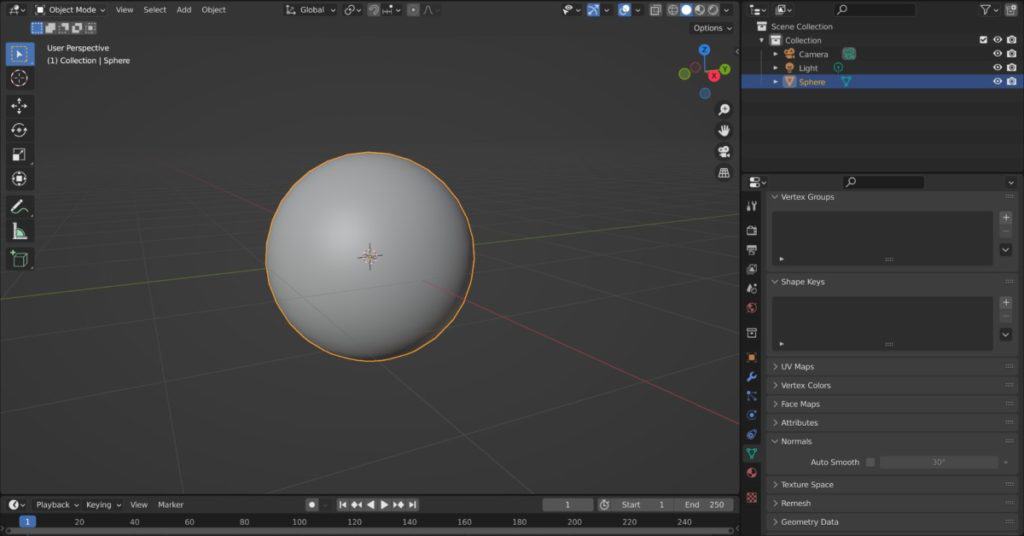
Because the angles for the edges on this kind of shape are softer, the shading is generally better than the cube, even if there is not that much geometry on the sphere.
The second image shows the same sphere when the auto smooth tool is active, and the angle is reduced to 11 degrees.
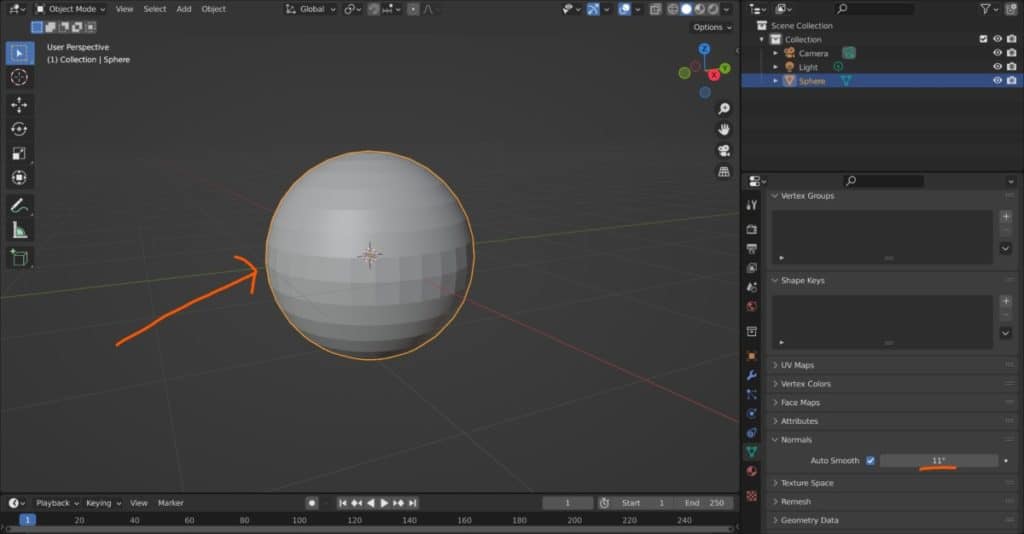
The value here is the maximum angle that will undergo smooth shading, and any edges above the above are not shaded smooth and instead appear sharp.
Setting the max angle down to 8 degrees increases the number of sharp edges on the model even further, as seen below.

Thanks For The Article
We appreciate you taking the time to read through this article. We hope you found the information that you were searching for. Below we have compiled some extra articles surrounding the topic that you may be interested in reading.
- What Does Mark Crease Do To Our Geometry?
- Keeping Edges Sharp When Using The Subdivision Surface Modifier
- The Main Purpose Of The Mark Sharp Tool
- What Are The Shortcuts For Edit Mode In Blender?
- Why Is My Model Transparent With No Visible Faces?
-
Cloth & Drapery: Blender Modelling Tricks
Modeling realistic cloth and drapery with specialized techniques in Blender.
-
Symmetrical Sculpting in Blender
Achieving perfect symmetry in sculpting projects with Blender.
-
Detailing with Dyntopo in Blender
Enhancing details using dynamic topology for refined sculpts in Blender.