In modeling, you work with objects of various shapes and sizes. Some of these objects have sharp edges while others have more curved, organic structures. With 3D modeling, we can assign values to our geometry that controls how the geometry is affected by certain tools. Like the mark sharp tool for instance.
The mark sharp tool assigns an attribute to a specific edge that affects the normal data of that edge, which is the direction the geometry is facing. As such, it influences the effect of tools that work with edge normals, like the edge split modifier, and the auto smooth option.
Using the mark sharp tool can have many benefits to the structure of your geometry, as well as the shading of materials on the surface of the object that is affected to a degree by the object’s normals.
How To Apply The Mark Sharp Tool To An Object?
To apply the mark sharp attribute to an edge using the mark sharp tool, first, go into edit mode for your selected object and select an edge.
Next, open up the edge menu by selecting it from the 3D viewport header or use the hotkey of Control + E to open the same menu.
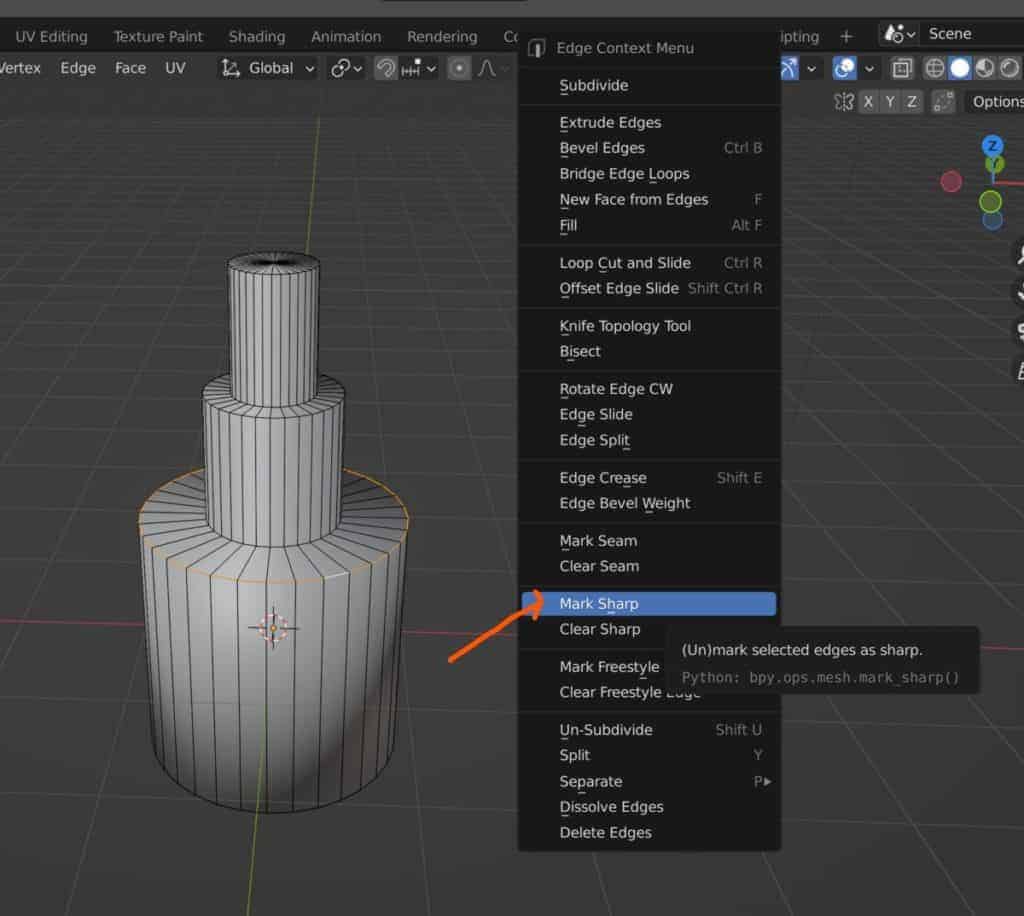
Within this menu you will find the Mark Sharp option in the bottom third, so select it to mark the selected geometry as a sharp edge.
When you do so, that edge will appear with a blue highlight to indicate in the viewport that it has been marked as a sharp edge.
If you want to clear any sharp edges, you can do so by again selecting those edges and returning to the edge menu.
Locate the Clear Sharp tool, which can be found directly underneath the Mark Sharp tool in the Edge menu, and select it to remove the sharp attribute from the selected edge or edges.
If The Mark Sharp Tool Effects Normals Data, Does It Affect Smooth Shading?
If you have used the smooth shading option, you will probably know that the tool manipulates the perceived direction of the edge and vertex normals to change the way that light bounces off the surface of the geometry. However, the tool does not affect the direction of the normals themselves.
As a result of this, marking edges as sharp edges will not change the shading applied to the surface of the object when smooth shading has been applied.
Another tool needs to be enabled to actually get the mark sharp tool to affect the shading, and that is the auto smooth tool.
Combine Smooth Shading, Mark Sharp And Auto Smooth
While the mark sharp tool does not seem to work with the smooth shading tool initially, we do need to use smooth shading in order for mark sharp to work. We are just missing one option, auto smooth.
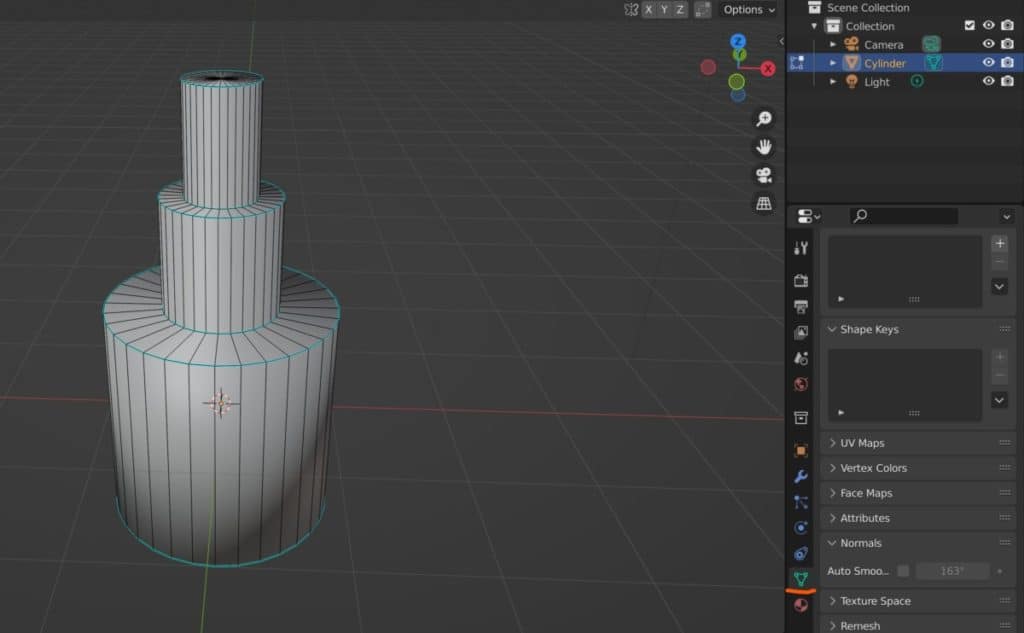
To enable auto smooth, make sure that your object is selected, and then go to the object tab in the properties panel.
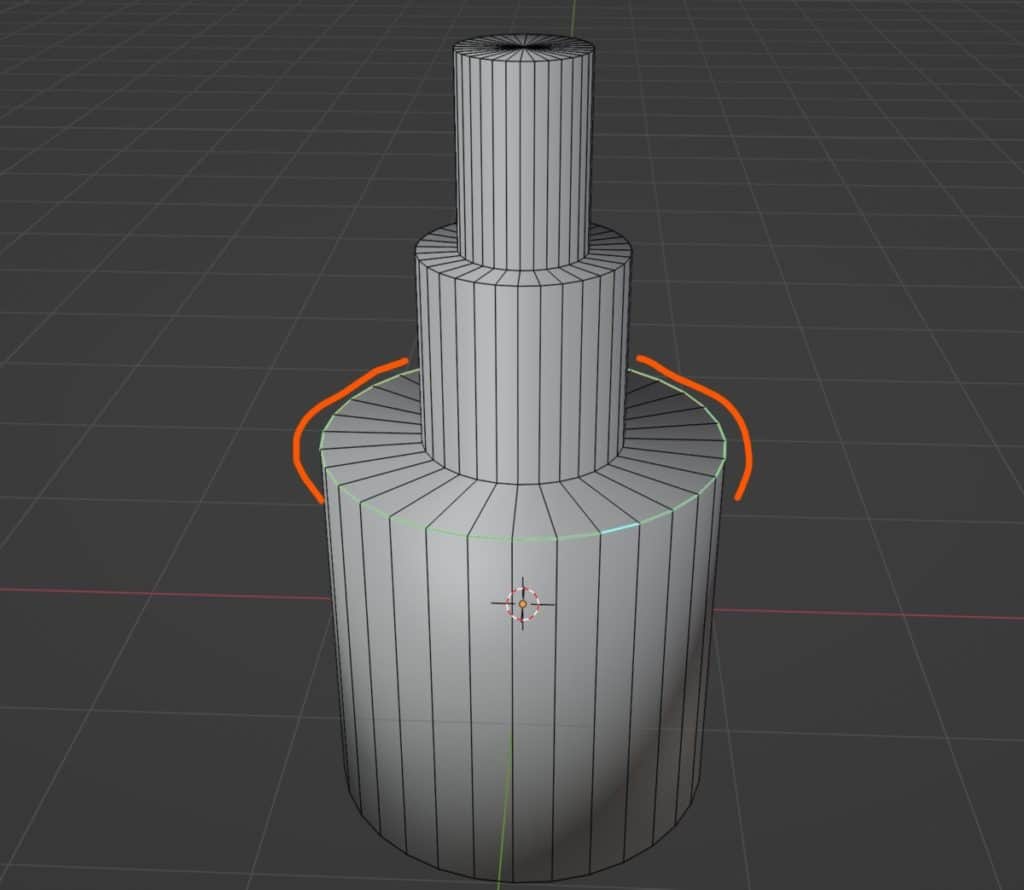
Open up the menu that is labeled as normals and you will see the option to enable the auto smooth option. Below we have two images of the same object, where you can see the edges that have been marked as sharp.
In the first image, the auto smooth option has not been applied, and the shading looks weird as a result because we have a combination of sharp edges and smooth shading.
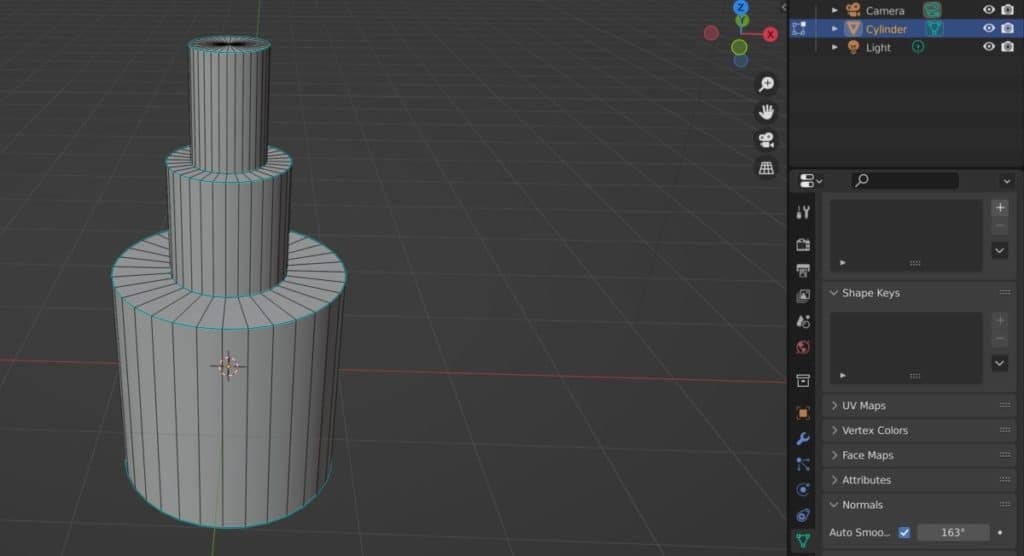
In the second image, auto smooth has been ticked in the preferences panel, and now Blender knows which of the edges are sharp and which are not, so it can adjust the shading accordingly.
The mark sharp option is used as a control for the auto smooth tool, which itself almost acts as a replacement to the shade smooth option, which changes the shading of the hole model without any room for control.
With auto smooth, you locate all edges on your model that have an angle value that is LOWER than your assigned value and applies smooth shading to those areas.
This works very well by itself but the mark sharp tool is useful because you can tool auto smooth what edges to completely ignore, which are the sharp edges. This grants you total control over how the surface of the object will be shaded.
Mark Sharp Edges Vs The Edge Split Modifier
If you have used the edge split modifier before, you will know that the effect it has on your geometry is quite similar to the effect of the mark sharp tool when it comes to the shading, so are they the same, or are they different.
We know that mark sharp is a control tool used to adjust how the auto smooth function works on our model. When using the edge split modifier, we can see in the modifier tab that it also has an angle option for determining the shading, but has an additional option of whether you want sharp edges to be considered in the calculation of the modifier.
Set the edge angle to be higher than 90 degrees and then toggle on and off the use sharp option in the modifier to see how sharp edges affect the modifier’s influence.
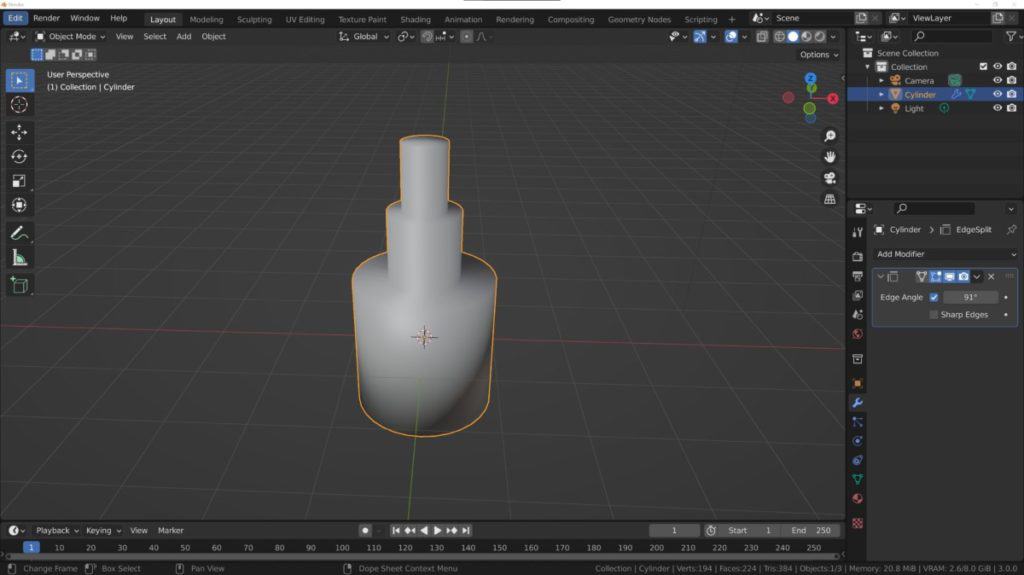
In this 1st image, the modifier is used instead of auto smooth on the object, with a high set angle. However, the modifier does not use sharp edges.
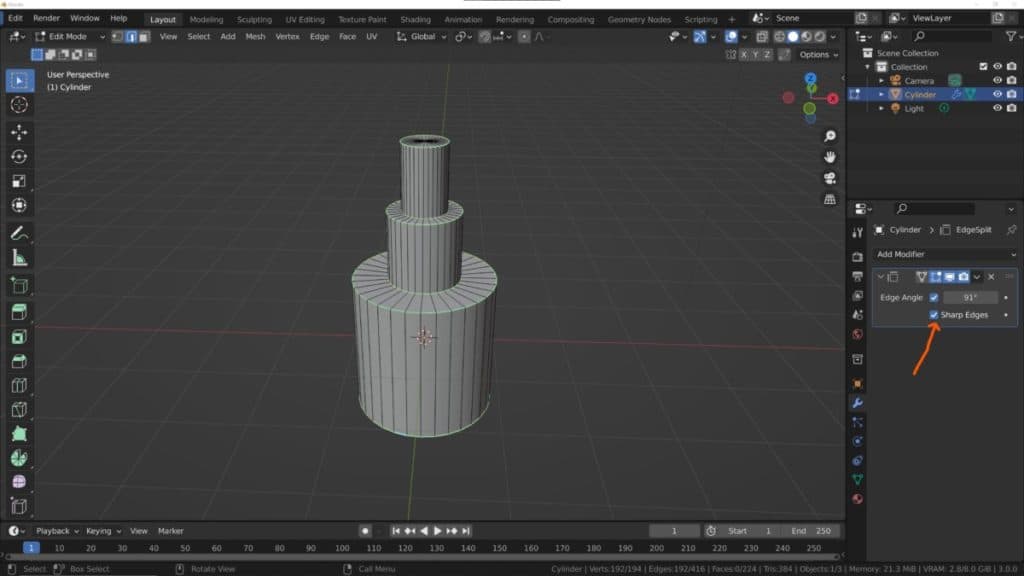
In the 2nd image, we have the exact same setup, only this time the checkbox for the Sharp Edges is now ticked, and the difference in the model is perfectly visible.
Thank You For Reading The Article
We appreciate you taking the time to read through the article and hope that you found the information that you were looking for. We have compiled a list below of additional topics that we believe will be of interest to you.
- Identifying Normals In Blender 3D
- Enable The GPU For Rendering In Cycles
- Changing The Units Of Measurement For Modeling
- Beginners Guide To Using The Camera In Blender
- Creating A Wireframe Mesh Out Of Any 3D Object
-
Symmetry for Hard Surfaces in Blender
Ensuring symmetrical perfection in hard surface models with Blender.
-
Detail with Shrinkwrap: Blender Modelling
Achieving intricate detailing with Blender’s Shrinkwrap modifier.
-
Edge Loops for Hard Surfaces in Blender
Utilizing edge loops for defining crisp hard surface details in Blender.