In Blender, we have a host of modifiers that we can use to create our 3D models using procedural, nondestructive workflows. Some of these modifiers may be similar in terms of the effect that they can have on your model or at least share certain characteristics.
Both the subdivision surface modifier and the multiresolution modifier can be used to increase the overall geometry of a 3D model. The main difference between the two modifiers is the subdivision surface only focuses on increasing the base resolution, while the multiresolution modifier is used to both increase and decrease your geometry count in different ways, such as when you are sculpting.
You can think of the multiresolution modifier as a more advanced version of the subdivision surface modifier if you like, but this barely scratches the surface. Where you choose to use these modifiers is just as important as the how.
What Does The Subdivision Surface Modifier Allow You To Do?
Before we can compare the differences between the two modifiers we first need to understand just how each of these modifiers is designed to function in itself, starting with the subdivision surface modifier.
The main purpose of the subdivision surface modifier is to increase the total amount of geometry across your entire 3D model. You have the option of increasing the amount of geometry in both the 3D viewport and the rendered image as two independent values.
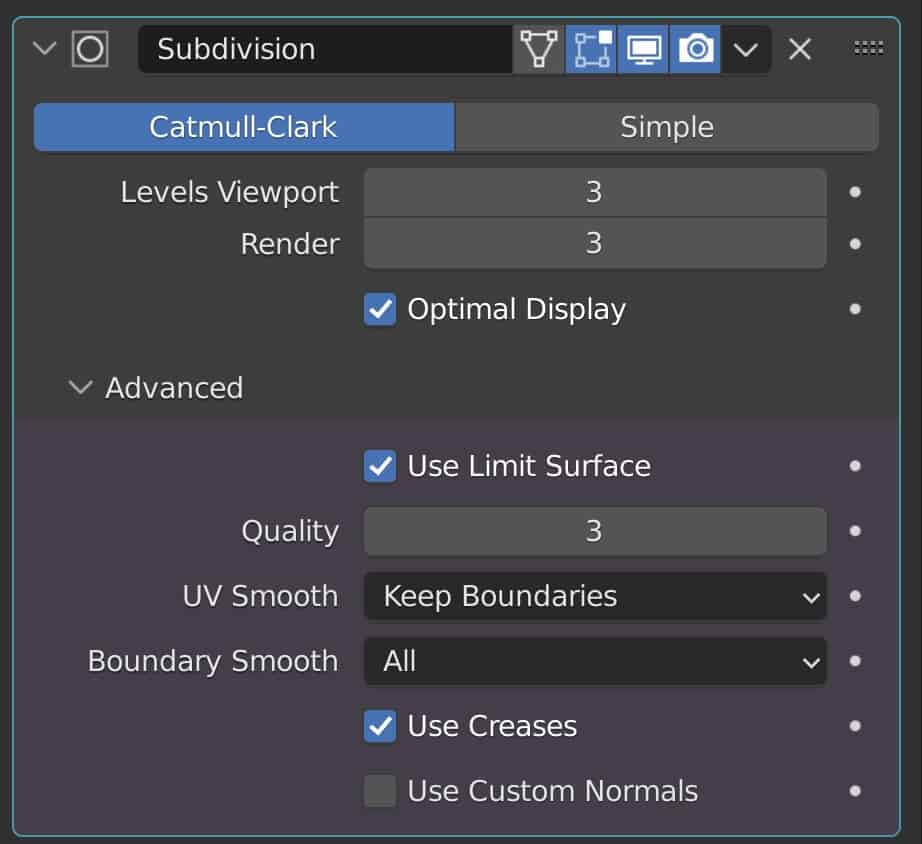
You can use this setup to preview your model at a slightly higher poly count by using a low levels value in the viewport, while also having a higher value for the render to get the best of both performance and results.
You also have access to some slightly more advanced tools such as the ability to improve vertex positioning on the model, as well as for deciding whether or not the modifier is influenced by any creases that you create, and the effect of the subdivision had on existing UV maps.
So in addition to increasing the amount of geometry on the model, you also have the capability to control how the subdivision surface is applied to the model.
How To Use The Multiresolution Modifier In Blender?
By contrast, the multiresolution modifier is more complex in its design and its purpose. With multiresolution, you are able to not only increase the amount of geometry through subdividing but also decrease it using the unsubdivide options.
Exactly how this is all done though is different from the subdivision surface. For example, in multiresolution you have the subdivide option, and also the simple and linear options underneath. All of these add additional levels to your subdivision increasing the geometry.
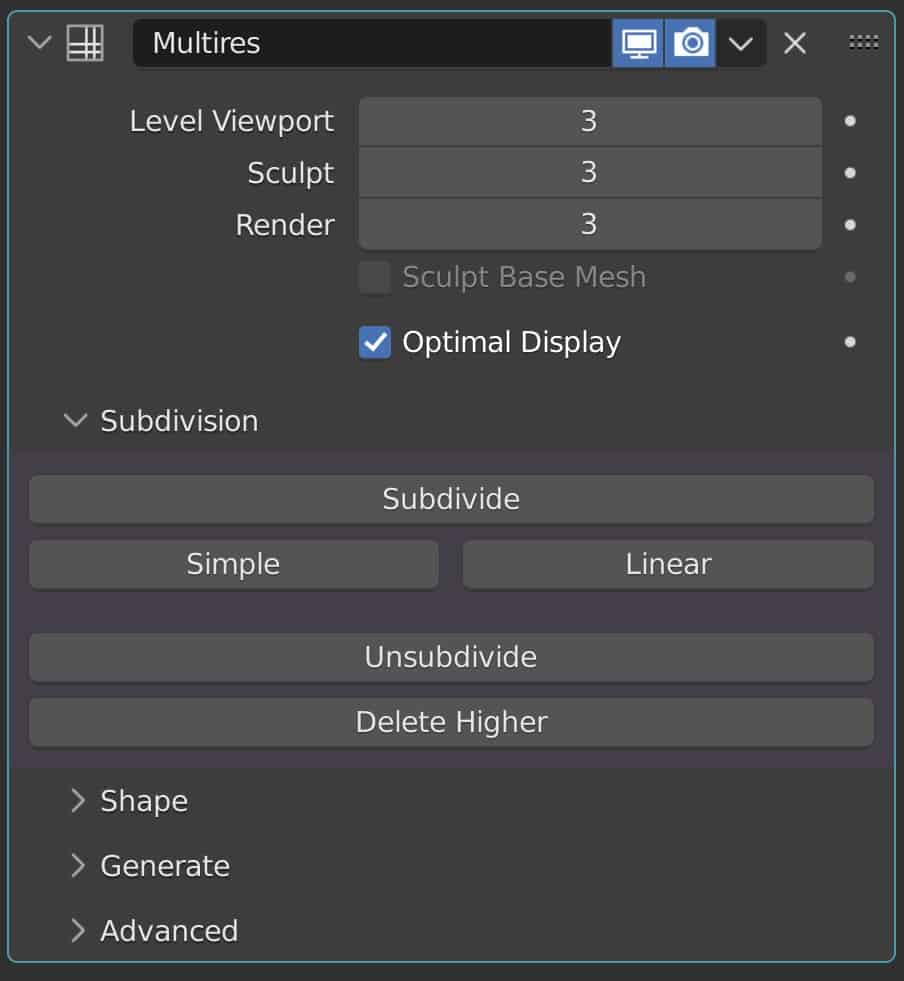
However, you have to keep in mind that using them in different orders will yield different results. The linear option will add a subdivision level but maintain the original shape.
The subdivide option will add a level and attempt to smooth out the geometry. The simple option is a midpoint between the two, keeping a similar shape but with more curvature, and can also be used as a bevel tool.
The Problem With Using Subdivision Surface And Why Multiresolution Is Better?
There are problems that arise from using any modifier, not least of which is the subdivision surface modifier, which is one of the oldest of them all.
This modifier has become a staple for many workflows for 3D artists, either as a preview tool or to actually build your geometry on, yielding better results quicker.
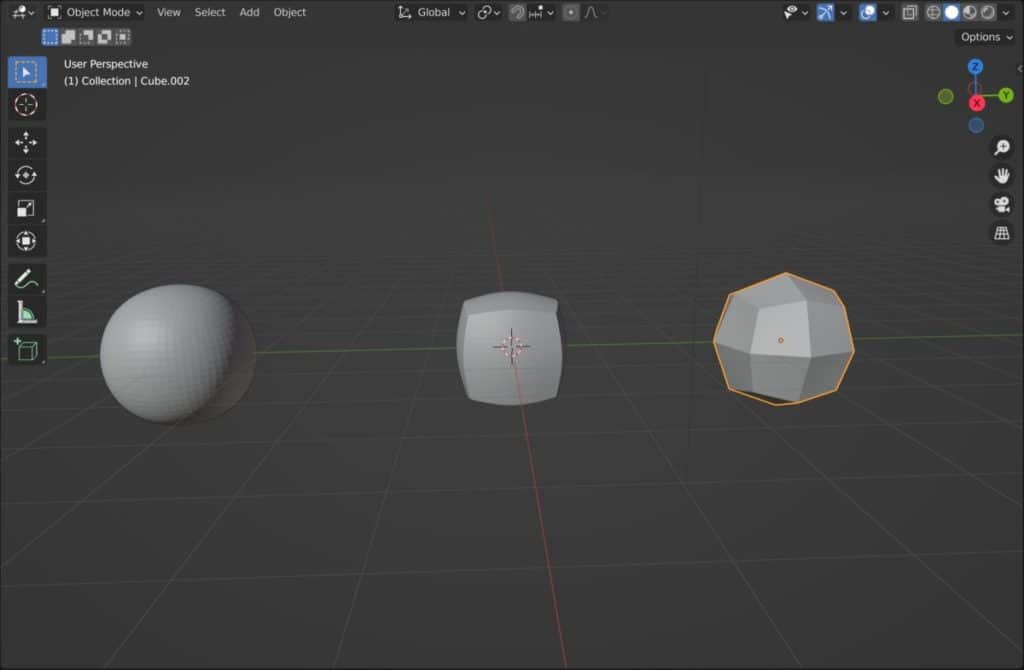
One problem with using subdivision surface is that it is not great with hard surface objects that have sharp edges. You either have to sacrifice the sharp edges and lose the base shape of the model or you can set the modifier to method to simple but keep the sharp edges.
Either may be fine for you but what if you wanted to have a slight bevel to the model. You can sort of do this by controlling the crease values along the edges but with the multiresolution, you can better control the shape by manipulating the different subdivide tools.
Another issue with using subdivision surface is with the sculpting workflow. The modifier is initially helpful in that it increase the amount of geometry that you have to work with, but when sculpting performance can easily take a hit, and the viewport can quickly become sluggish and unresponsive.
When increasing the number of subdivisions in total, you can then decrease the value for sculpting as its own value below the set value in the viewport, to allow for better performance while still allowing for the increased detail that the modifier allows.
When To Use Either Subdivision Surface Or Multiresolution When Modeling?
So exactly when should you use one modifier instead of the other? Well in most cases the subdivision surface modifier will still be sufficient. Such as when creating simpler models that do not require any form of sculpting or are generally low in terms of required detail.
In other words, the more detail and more geometry that is required for a model, the more useful the multiresolution tool becomes.
Additionally, you also have the ability to unsubdivide your model if the structure of your geometry allows it. So not only can you increase your poly count where required but also decrease it as well.
One key issue with the multiresolution modifier though is that it cannot be repositioned in the modifier stack like other modifiers if those modifiers attempt to change the base geometry.
If you were to attempt reordering the modifiers then the multiresolution will always be repositioned above any other modifiers that directly influence the geometry.
Thanks For Reading The Article
We appreciate you taking the time to read through the article and hope that you found the information that you were looking for.
- Why Does The Modifier Appear Red In The Modifier Stack?
- How To Keep Sharp Edges When Using The Subdivision Surface Modifier?
- The Main Purpose Of The Mark Sharp Tool
- Retopologize Your Model The Fast Way
- Troubleshooting Problems With The Subdivision Surface Modifier
-
Blender Challenge Winners: Top Designs
Recognizing outstanding Blender designs in challenge-winning showcases.
-
Genre Showcases: Sci-Fi, Fantasy in Blender
Exploring genre-specific Blender projects, from sci-fi to fantasy.
-
Seasonal Best: Blender Showcase Series
Featuring the best seasonal Blender creations in a series showcase.